In some situations, Android users may become locked out after resetting their device without remembering Google account credentials. At this point, people sometimes consider the SD card FRP bypass method, especially when older phones or limited system access restrict recovery options. It is often discussed as a potential solution for devices that support external storage-based procedures. This guide highlights when SD card FRP bypass may be required and how to bypass FRP with SD card via OTG.

- Part 1. Pros and Cons of FRP Bypass with SD Card
- Part 2. Requirements of FRP Bypass with SD Card
- Part 3. How to Bypass FRP with SD Card via OTG
- Part 4. How to Bypass FRP without SD Card on PC
- Part 5. Conclusion
Part 1. Pros and Cons of FRP Bypass with SD Card
Nowadays, SD card and OTG-based FRP methods are widely discussed, but they are not officially supported by most manufacturers. Some users report success on older devices, while others experience complete failure due to updated security patches. Below, we outline both the potential advantages and the significant limitations of this FRP bypass method.
- Free method availability.
- Not difficult to perform.
- Uses external storage access.
- Works on older devices.
- Not compatible newer Android versions.
- Security patches block process.
- Risk of device malfunction.
- No guaranteed success rate.
Part 2. Requirements of FRP Bypass with SD Card
After understanding both the advantages and drawbacks of using an SD card for FRP bypass, you need to prepare the necessary tools and conditions before moving forward. Proper preparation ensures smoother execution and reduces the chance of errors during the process.
- An Android phone (Android 5 to 6)
- A computer for file preparation
- A micro SD card available
- A SD card reader
- A functional OTG cable
- A USB cabele
- A stable internet connection
Part 3. How to Bypass FRP with SD Card via OTG
Once all preparations are complete, the next step is to follow a structured approach to attempt the SD card- and OTG-based FRP bypass process. The general idea is to move required files to external storage and access them through device setup options.
Step 1. Download the Quickshortcut APK on your computer and copy it to a micro SD card using a card reader.

Step 2. Insert the SD card into the FRP-locked Android device.
Step 3. Install and open SideSync on your computer, then connect your phone with a USB cable.
Step 4. When the Open with prompt appears, select Galaxy Apps.
Step 5. Tap Agree and Install, then wait for SideSync to finish installing.
Step 6. Select Open > OK > Start to launch the app.
Step 7. Select the three-dot icon on the screen, then open the Settings menu.
Step 8. Choose Save received items in and set the location to SD card.
Step 9. Open the APK file stored on the SD card and install it. Enable Unknown Sources if required.
Step 10. Launch QuickShortcutMaker, search for Google Account Manager, and select Type Email and Password.
Step 11. Sign in with a new Google account and wait for the account to be added.
Step 12. Press and hold the Power button, then reboot the device.
Step 13. Complete the setup process. The device should now bypass the FRP verification screen.
Part 4. How to Bypass FRP without SD Card on PC
Although SD card-based FRP bypass methods are widely discussed, they are not always the most reliable option for modern Android devices. In many cases, users experience compatibility issues or repeated failures during the process. Because of this, alternative solutions like using an FRP unlocker is often considered more practical and efficient.
| Method | Need OTG | Need PC | Success Rate | Supported Version |
|---|---|---|---|---|
| SD Card FRP Bypass | Yes | Yes | 70% | Android 5 to 6 |
| MagFone FRP Unlocker | No | Yes | 95% | Android 5 to 16 |
MagFone Android Unlocker offers an alternative for users who prefer a more straightforward approach to SD card procedures. It is designed to simplify the FRP removal process using a guided interface on a computer. This makes it suitable for users who want a faster and more reliable solution. Here's how to use MagFone Android Unlocker for FRP bypass.
MagFone Android Unlocker
Remove multiple kinds of screen locks on over 5000 Android devices and delete Google FRP lock without a password.
Step 1 Connect Device and Launch Software
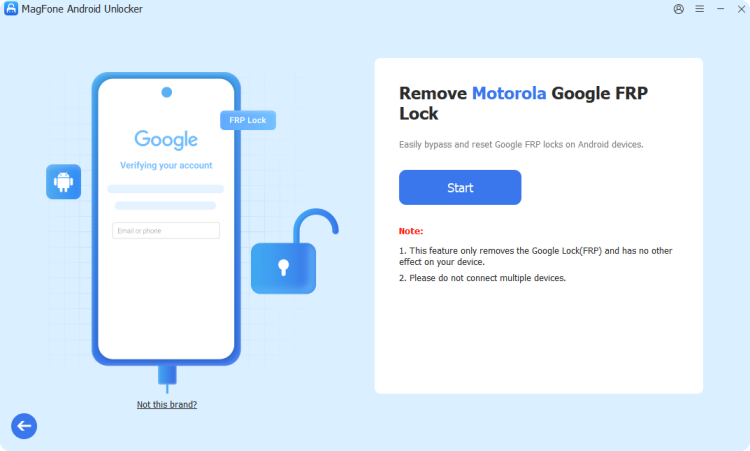
Set up and run MagFone Android Unlocker on your PC. Next, establish a connection between your FRP-locked Android device and the computer using a USB cable. From the main interface, choose the Remove Google FRP Lock option to begin the process.
Step 2 Detect Device and Confirm Details
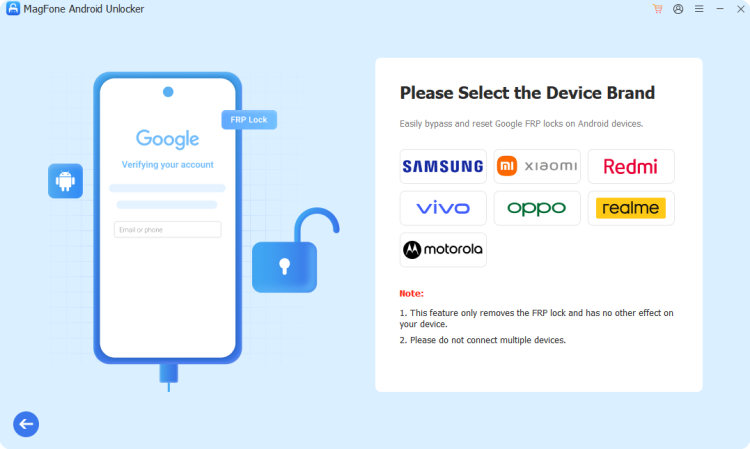
Allow the MagFone program to automatically recognize your device. If it doesn't detect correctly, manually select your phone brand and Android version from the list. Once everything is confirmed, click the Start button to continue.
Step 3 Follow Instructions and Unlock FRP
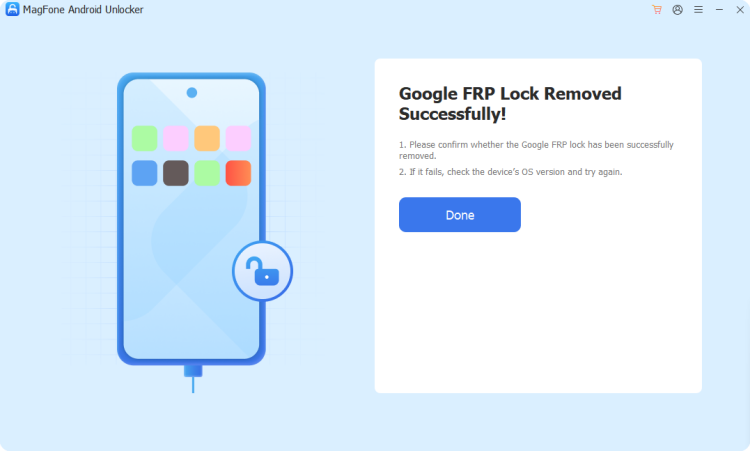
The software will display guided steps tailored to your Android device. Carefully follow the instructions shown on both your phone and computer screen. After completion, the tool will notify you that the FRP lock has been successfully removed.
Part 5. Conclusion
FRP bypass using an SD card via OTG is often discussed for older Android devices, but its effectiveness varies with the system version and security updates. Users may find it helpful in limited cases, though newer devices often restrict such access methods entirely. For most users, exploring safer and more consistent alternatives ensures better long-term device accessibility and performance.

Teresa Miller
Editor in chief