
Factory resetting your Android device can sometimes lead you to the Google verification screen during setup, also known as Factory Reset Protection (FRP). This happens when you forget to remove the Google account before factory resetting your Android phone. In this guide, we show you the official ways to disable this FRP lock. We also provide some other methods to help you bypass FRP after factory reset when the password is forgotten. Let's dive in.
- Part 1. Pre-Read: FRP Bypass After Factory Reset
- Part 2. How to Disable FRP After Reset Without PC
- Part 3. How to Bypass FRP After Factory Reset with PC
- Part 4. Conclusion
Part 1. Pre-Read: FRP Bypass After Factory Reset
FRP lock is a built-in Google security system that activates when an Android phone is reset without removing the linked Google account. It appears during setup and asks for previous credentials. If you cannot verify them, the device remains locked. In this guide, we provide six solutions on how to bypass FRP after factory reset, including methods that work directly on Android and others that require a PC for assistance.
| Method | Requirements | Difficulty | Success Rate |
|---|---|---|---|
| Lock Screen | Recovery email or Phone number | Easy | 100% |
| Keyboard Unlock | Android 6 or older version | Hard | 70% |
| TalkBack Unlock | Accessibility access | Hard | 70% |
| MagFone FRP Unlocker | PC + USB cable | Easy | 98% |
| OTG Unlock | PC + OTG cable + USB cable + APK file + SD card + SD card reader | Medium | 75% |
| ADB Commands | PC + ADB tools + USB cable | Hard | 80% |
MagFone Android Unlocker
Easily bypass Android FRP lock, highly efficient and convenient operation.
Part 2. How to Disable FRP After Reset Without PC
If you want to know how to disable FRP after reset Android without using a computer, there are several practical solutions available. Pick the option that matches your situation and follow the instructions carefully to remove the FRP restriction successfully.
Method 1. Disable FRP on Lock Screen
If you remember the Google account linked to your device, simply sign in on the verification screen to unlock FRP. If you forgot the password, you can recover it through Google's account recovery page. Once verified, the system automatically removes FRP and restores full access after setup completion.
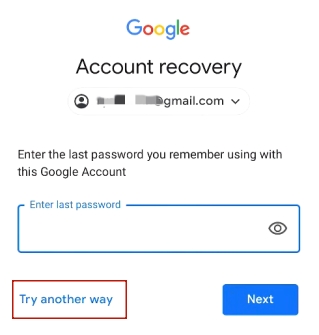
Step 1. Open a web browser on another device and go to the Google Account Recovery page.
Step 2. Type in the email address connected to the locked phone and press Next.
Step 3. Choose Try another way and request a verification code to your recovery email or phone number.
Step 4. Enter the code you received and set a new password for your Google account.
Step 5. Then use it on the FRP verification screen to unlock your device.
Method 2. Disable FRP with Keyboard
This approach uses built-in keyboard and system shortcuts to access hidden settings and bypass verification. The process involves several steps through keyboard menus and system search functions, making it slightly complicated but still useful for older devices (Android 6.0 and earlier).
Step 1. On the Verify PIN screen, tap Use Google Account Instead.
Step 2. Tap the text field, open the keyboard, and press the Settings (gear) icon.
Step 3. Select Reset to default settings and clear all listed data.
Step 4. In Keyboard Settings, tap Languages and types.
Step 5. Open Manage input languages > More > Check for updates.
Step 6. Update English (UK), English (US), Español (ES), and Español (US).
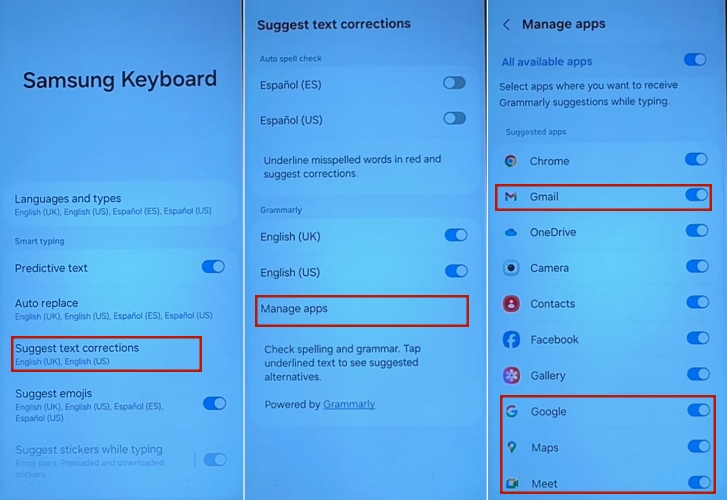
Step 7. Go to Suggest text corrections > Manage apps.
Step 8. Turn off Email, Google, Maps, Meet, Play Store, and Settings.
Step 9. Open More typing options and disable all options.
Step 10. Go to Text shortcuts and tap +.
Step 11. Enter #998812# as the shortcut and verify Pin as the phrase, then tap Add.
Step 12. Open Layout, enable Alternative characters, then set Button and symbol layout to Alternative.
Step 13. Return until the Wi-Fi settings screen appears.
Step 14. Select the connected Wi-Fi, tap View more, and change MAC address type to Phone MAC.
Step 15. Tap Security and confirm the connection status.
Step 16. Tap Next > Skip > Don't copy, then continue skipping until Google Services appears and accept it.
Step 17. Select Forgot password or don't have an account > Set up later in Settings.
Step 18. Finish the setup to access the phone without entering a PIN.
Method 3. Disable FRP via TalkBack Mode
TalkBack mode can also help bypass FRP by using accessibility features built into the system. However, the exact steps can vary depending on the phone model and Android version. Below is an example of how to bypass FRP on a Samsung device running Android 11.
Step 1. Turn on the Samsung device and connect it to a stable Wi-Fi network.
Step 2. On the welcome screen, enable TalkBack by pressing both volume buttons at the same time.
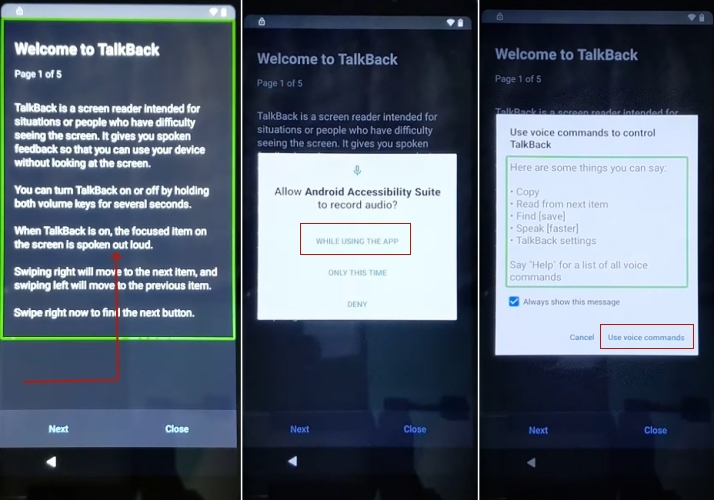
Step 3. Draw an L-shaped gesture to open the TalkBack menu.
Step 4. Select While using the app, then tap Use voice command.
Step 5. Tap the keyboard icon, then press and hold both volume buttons to disable TalkBack.
Step 6. Tap More at the bottom of the screen and choose Explore more from Assistant.
Step 7. On the Explore page, tap the profile icon and open Help.
Step 8. In the search bar, type Delete, disable & manage unused apps on Android.
Step 9. Open the result labeled Tap to go to Application Settings.
Step 10. Scroll down, tap OPEN, then navigate to Accessibility > Accessibility Menu and enable the Accessibility Menu shortcut.
Step 11. Return to Settings, open Apps & notifications, and tap See all apps.
Step 12. Open Android Setup and tap Force Stop.
Step 13. Go back and disable Google Play Services.
Step 14. Return to the previous screen, tap Assistant > Settings, and re-enable Google Play Services.
Step 15. Then you can set up your Android device without FRP lock.
Part 3. How to Bypass FRP After Factory Reset with PC
If you have access to a computer, there are several effective ways to bypass FRP using PC-based tools and additional accessories. These solutions are often faster and more stable when you're looking for a faster solution but forget the Google account password.
Method 1. Bypass FRP via MagFone Android Unlocker
With a PC, MagFone Android Unlocker is the simplest way to bypass FRP after a factory reset. This software helps remove Google verification and lets you complete the Android setup process without hassle. It also supports unlocking screen locks such as PIN, pattern, and password. Below, we show the compatibility and instructions for using it to efficiently bypass FRP.
| Supported Device | Samsung, Xiaomi/Redmi, Vivo, Motorola, Oppo/Realme |
| Supported Version | Android 5 to 16 |
| Supported Platform | Windows & Mac |
Step 1 Connect Device and Launch Software
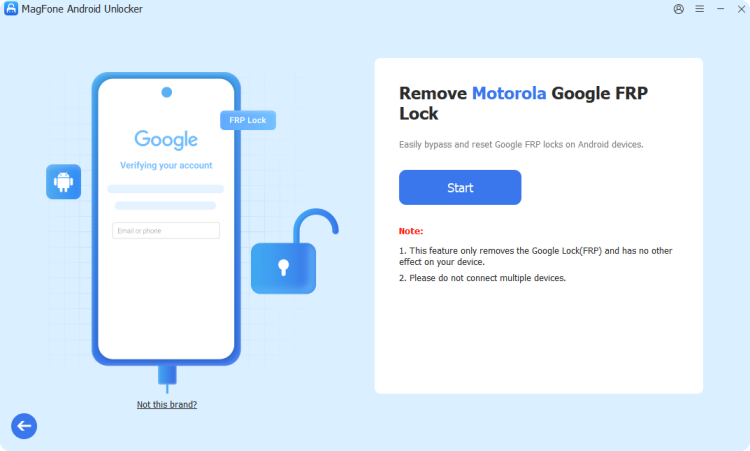
Install the unlock tool on your computer and open it. Use a USB cable to connect your Android phone. From the main screen, select the option for FRP removal to begin the process and prepare your device for detection.
Step 2 Detect and Confirm Device Information
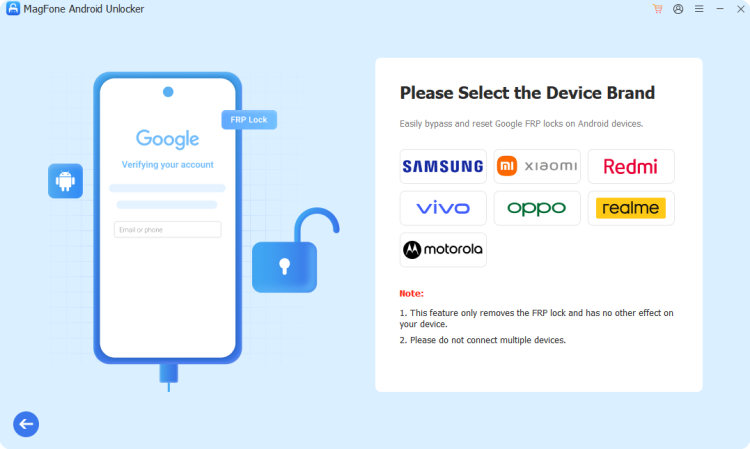
Once connected, the software will try to identify your phone automatically. If it fails, manually choose the correct manufacturer and Android version. Confirm the details to ensure the tool applies the right unlocking method for your specific device model.
Step 3 Finish FRP Bypass on Android Devices
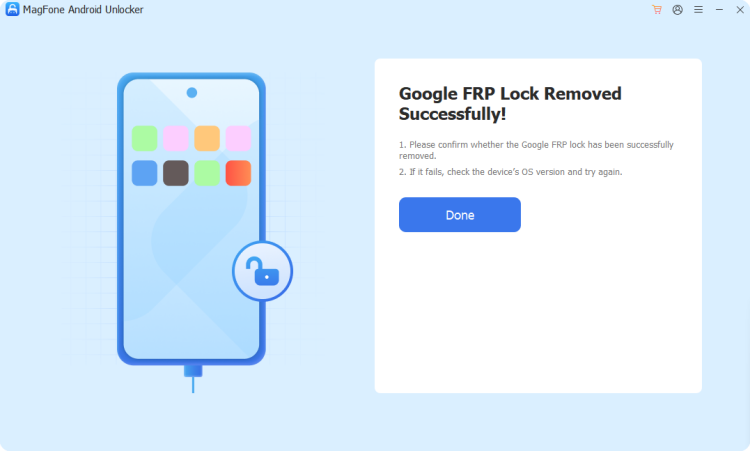
After confirmation, the program will guide you through step-by-step prompts. Follow both computer instructions and phone notifications carefully. The tool will complete the process and remove FRP protection, allowing you to finish setup and access your device normally.
Method 2. Bypass FRP Through OTG
Another way to bypass FRP after factory reset is using an OTG cable. This method lets you transfer an FRP bypass APK from a USB drive to your phone. However, you must prepare the OTG cable, APK file, and stable connection before starting. It mainly works on older Android versions and devices.
Step 1. Download the QuickShortcutMaker APK on your PC and transfer it to a micro SD card.
Step 2. Insert the SD card into the locked Android device and install SideSync via USB connection.
Step 3. Open SideSync, access the menu, and install the APK from the SD card (enable Unknown Sources if prompted).
Step 4. Launch QuickShortcutMaker, open Google Account Manager, and sign in with a new account.
Step 5. Finally, reboot and finish the setup to bypass FRP.
Method 3. Disable FRP Using ADB Commands
ADB commands allow advanced users to modify system settings from a connected computer, including skipping FRP verification. However, this method requires proper driver installation and USB debugging-related access. Errors such as ADB not found, making it more suitable for users familiar with Android development tools.
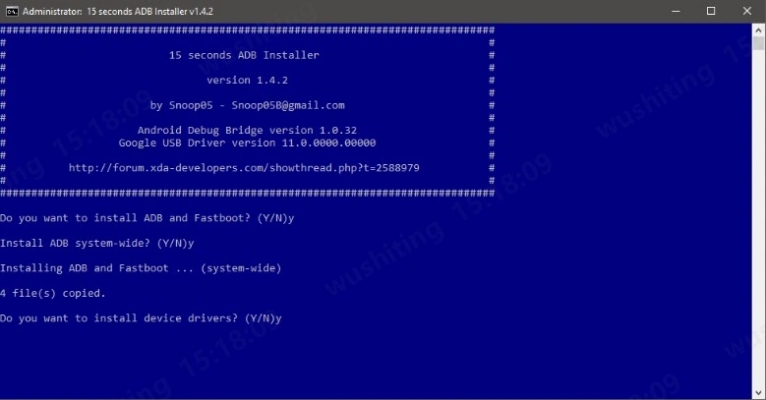
Step 1. Download ADB Platform Tools from a trusted source and extract them to a folder on your PC.
Step 2. Run adb-setup.exe, press Y, and complete the driver installation.
Step 3. Connect your Android phone to the PC via USB and wait for detection.
Step 4. Open the ADB folder, hold Shift + right-click, then choose Open command window here or Open PowerShell window here to move on.
Step 5. For Samsung devices, run the required ADB commands one by one and press Enter after each.
Step 6. For MTK or SPD devices, enter the alternative ADB command as shown and execute it.
Step 7. Once finished, reboot the phone. The FRP lock should be removed and setup can continue normally.
Part 4. Conclusion
Learning how to disable FRP after reset is essential when you get locked out of your Android device. Whether you choose methods like account login, OTG, TalkBack, keyboard tricks, or ADB, each offers different success levels. For faster results, MagFone Android Unlocker provides a quicker option. Understanding how to bypass FRP after a factory reset helps you regain access and restore your phone efficiently without unnecessary delays.

Teresa Miller
Editor in chief