
Mobile repair tools are becoming more important as Android devices continue to grow in complexity. Many users search for Advance Turbo Flasher when they need to unlock a phone, repair software issues, flash firmware, or recover a device stuck on the boot screen. Professional technicians also use it for servicing older and supported smartphone models. In this guide, we'll explain everything about Advance Turbo Flasher, including its features, pricing, download process, setup steps, and how it compares with other Android unlocking solutions.

- Part 1. Advance Turbo Flasher: Main Features
- Part 2. Advance Turbo Flasher: Price List
- Part 3. Advance Turbo Flasher: Download & Setup
- Part 4. Advance Turbo Flasher vs. MagFone Android Unlocker: Which Is Better?
- Part 5. Conclusion
Part 1. Advance Turbo Flasher: Main Features
Advance Turbo Flasher(ATF) is designed for mobile servicing professionals who regularly work with software-related phone issues. The tool supports flashing, unlocking, and repairing across several smartphone brands. Here are some main features of the Advance Turbo Flasher tool.
Performs screen lock and password reset operations.
Compatible with Nokia, Samsung, LG, HTC, and Sony devices.
Supports firmware flashing for multiple Android and feature phone brands.
Helps repair soft-bricked and dead smartphones.
Allows SIM unlocking on supported devices.
Supports custom firmware installation, firmware repair, and software restoration.
Part 2. Advance Turbo Flasher: Price List
Advance Turbo Flasher is not a free service, as it requires licensed software and compatible hardware to function properly. The total cost varies depending on the package type, the specific features, and the reseller. In general, prices range from $60 to $150.
Part 3. Advance Turbo Flasher: Download & Setup
Before using Advance Turbo Flasher, users need to install the software along with the required USB drivers on a Windows computer. The latest Advance Turbo Flasher EXE setup file is usually available through official distributors, trusted mobile repair forums, or verified servicing websites. Follow the steps below to learn how to properly install and set up Advance Turbo Flasher on your computer.
Step 1 Download the Advance Turbo Flasher Setup File
Visit a trusted source and download the latest Advance Turbo Flasher download package. Make sure the downloaded file matches your Windows version and includes the required drivers.
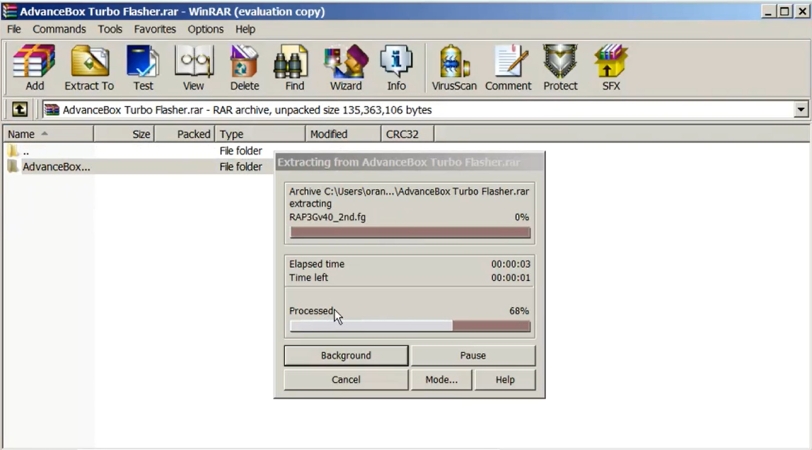
Step 2 Extract the Downloaded Files
Most ATF setup packages are compressed in ZIP or RAR format. Use extraction software such as WinRAR or 7-Zip to unpack the files into a separate folder.
Step 3 Install USB Drivers
Open the extracted folder and install the included USB drivers. These drivers are necessary because they allow the software to recognize connected Android devices during servicing.
Step 4 Run the Advance Turbo Flasher EXE File
Locate the Advance Turbo Flasher EXE setup file and launch it as an administrator. Follow the installation instructions shown on the screen until the setup process is complete.
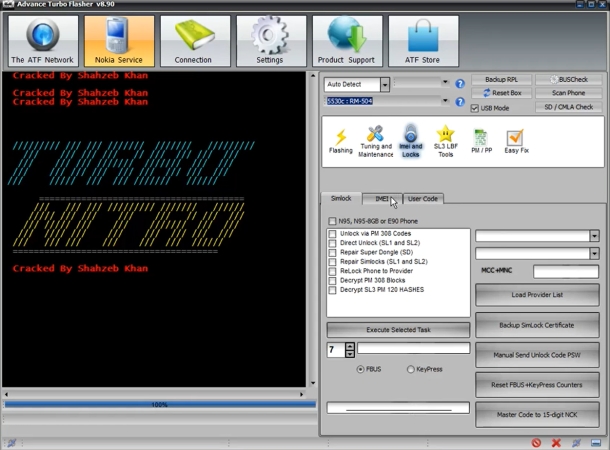
Step 5 Launch the Software
After installation finishes, open the ATF tool from the desktop shortcut or installation folder. Wait for the interface to fully load before connecting your device.
Step 6 Connect Your Android Device
Turn off your phone and connect it to the computer using a compatible USB cable. Some devices may require test mode, download mode, or flashing mode before detection.
Step 7 Select the Correct Device Platform
Inside the software interface, choose the correct platform for your device. Common options may include BB5, MediaTek, MeeGo, or NXPlatform, depending on the phone model.
Step 8 Load Firmware Files
Navigate to the Flashing tab and browse for the correct firmware package. Always use compatible firmware files because incorrect files may cause software corruption.
Step 9 Start the Flashing Process
Click the FLASH button to begin installing or repairing the firmware. Do not disconnect the phone during this process because an interruption may damage the software.
Step 10 Unlock Screen Password or User Code
To remove the screen lock, switch to the Service tab and choose the Reset User Code option. Connect the phone in test mode and allow the tool to complete the unlocking process automatically.
Step 11 Restart the Device
Once the operation is complete, disconnect the device safely and restart it. Verify whether the screen lock has been removed successfully and ensure the phone boots normally.
Part 4. Advance Turbo Flasher vs. MagFone Android Unlocker: Which Is Better?
Although Advance Turbo Flasher offers several professional servicing functions, it also comes with some disadvantages for regular users. The software often requires technical knowledge, making it difficult for beginners to use correctly. Certain operations may involve complicated setup procedures, additional drivers, and hardware support. Here we summarized the pros and cons of this tool for your references.
- Supports multiple phone brands.
- Repairs bricked and dead devices.
- Offers firmware flashing and unlocking.
- No official website
- Requires paid license access.
- Limited support for newer devices.
- Needs technical knowledge to operate.
MagFone Android Unlocker is often considered a more beginner-friendly alternative because it focuses on simplicity, speed, and accessibility. Unlike Advance Turbo Flasher setup procedures that may require technical servicing knowledge, MagFone provides a cleaner interface with easier navigation for normal users. It supports multiple Android lock removal methods, works with many modern Android devices, and simplifies FRP bypass procedures. You can follow these instructions and get started.
Step 1 Select Remove Screen Lock and Link Devices
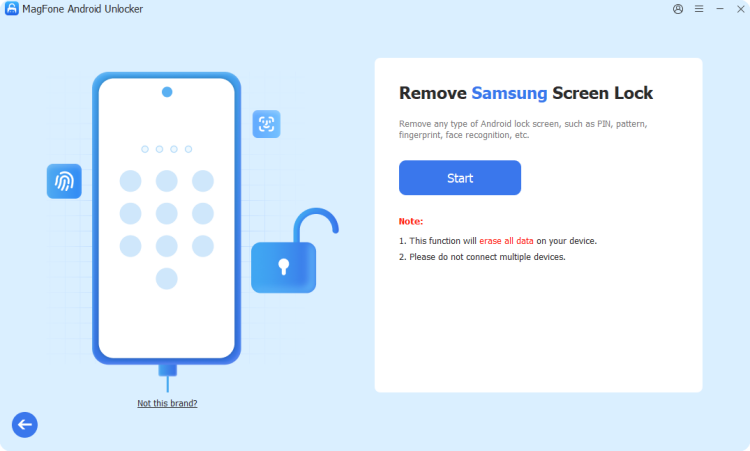
Install and launch MagFone Android Unlocker on your computer. From the main dashboard, choose the screen unlock option that matches your Android device. Then connect your locked phone to the computer using a USB cable so the software can recognize it.
Step 2 Go to Put the Device into Recovery Mode
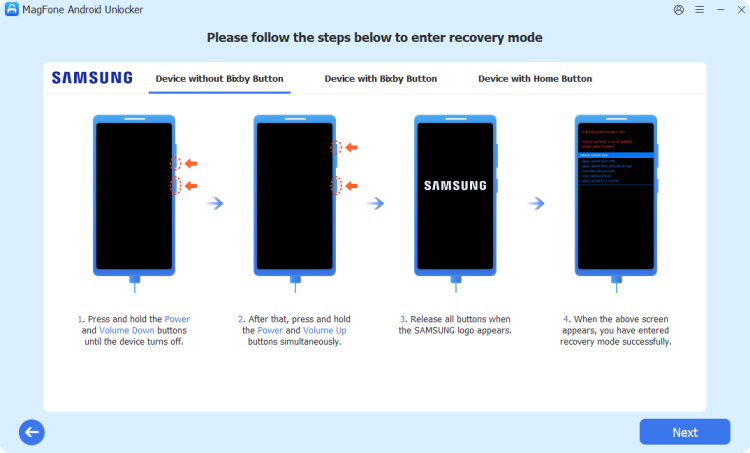
Follow the on-screen instructions provided by the program to boot your Android device into Recovery Mode. This step ensures the software can properly access the system needed for the unlock process. Once your phone enters Recovery Mode, proceed by clicking Next and confirming when required.
Step 3 Start and Complete the Unlock Process
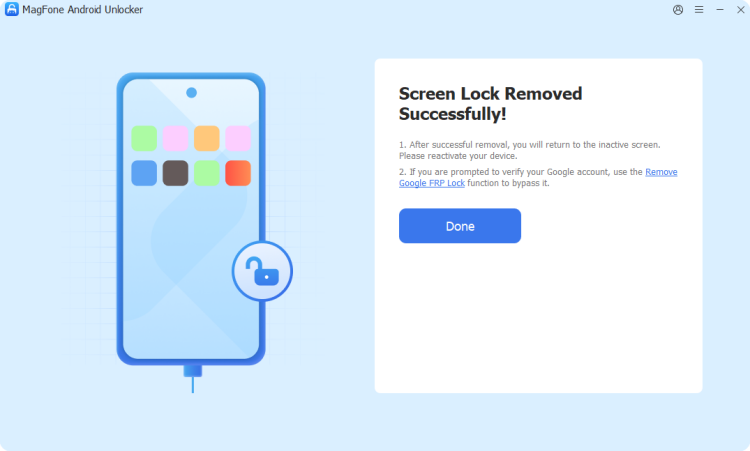
After entering Recovery Mode, continue following the guided steps shown on the screen to begin removing the lock. Confirm the prompts as instructed, then allow the tool to complete the process. When finished, you'll receive a message indicating the device screen lock has been successfully removed.
Part 5. Conclusion
Advance Turbo Flasher is a powerful solution for technicians who need advanced tools for flashing, unlocking, and repairing mobile devices, but it requires technical skills and proper setup. For everyday users, simpler alternatives like MagFone Android Unlocker provide a more accessible way to remove screen locks. Choosing the right tool depends on your experience level, device type, and repair needs.

Dylan Jones
Editor in chief