








Picked up a used Android phone, finished a factory reset, or handed your device to a friend, only to find an unfamiliar Google account still attached? It occurs more frequently than most people expect. Suddenly the screen demands credentials you never created, and your phone feels like it belongs to someone else. Don't worry. This guide walks through five practical ways to remove previously synced Google account from Android and take back full control of it.
- Part 1. Why Should You Remove Previously Synced Google Account from Android?
- Part 2. How to Remove Previously Synced Google Account from Android Before Reset
- Part 3. How to Remove Previously Synced Google Account from Android After Reset
- Part 4. How to Prevent a Previously Synced Google Account on Android In the Future
- Part 5. Conclusion
Part 1. Why Should You Remove Previously Synced Google Account from Android?
Leaving an old Google account on your phone creates real problems. Factory Reset Protection ties your device to that account, so a reset alone won't free it, and you may be locked out during setup. Old accounts also expose personal data when you sell or gift a phone, and they block secondhand buyers from using what they paid for. Removing the account protects your privacy and restores full ownership.
Part 2. How to Remove Previously Synced Google Account from Android Before Reset
If you still remember your Google email and password, the cleanest fix is to remove the account before you reset. Doing so switches off Factory Reset Protection, so setup won't ask for verification afterward. Keep in mind that removing the account also clears the Google-synced data stored on the phone.
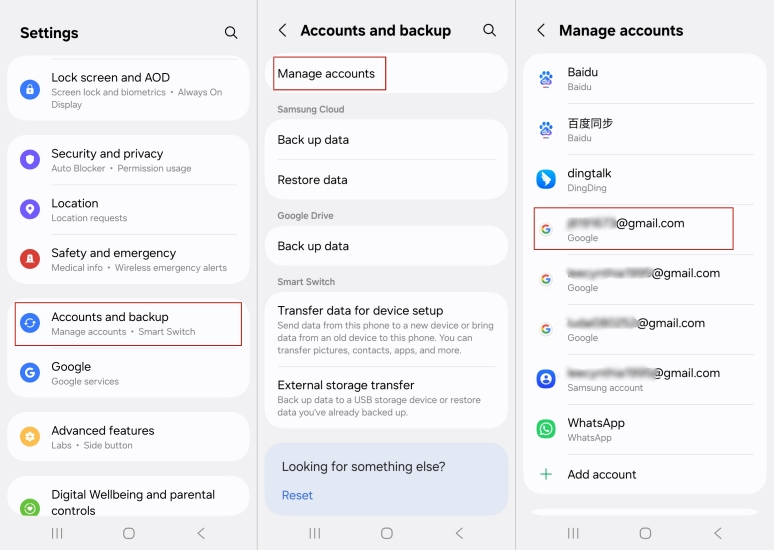
Step 1. Launch Settings on your Android device.
Step 2. Tap Accounts and backup and choose the Manage accounts section.
Step 3. Find the Google account you want to delete and tap it.
Step 4. Tap Remove Account and confirm the action when prompted.
Step 5. Type your Google password if prompted to finish the removal.
Part 3. How to Remove Previously Synced Google Account from Android After Reset
Once a reset is done and the phone demands the old account, Settings is out of reach, so you need another route. The options below cover different situations, from a dedicated unlocking tool to account recovery and remote sign-out. Pick the one that matches what you still have access to.
Method 1. Use MagFone Android Unlocker
The quickest way to bypass the Google account on your Android phone without a password is MagFone Android Unlocker. This software can be downloaded on both Mac and Windows computers, so you can run it on whichever system you have. First, check that your Android device is compatible with the program. Then follow the steps below to bypass FRP, along with the previous Google account, on your Android phone.

MagFone Android Unlocker
Remove multiple kinds of screen locks on over 5000 Android devices and delete Google FRP lock without a password.
Step 1 Connect Your Samsung Phone and Open MagFone
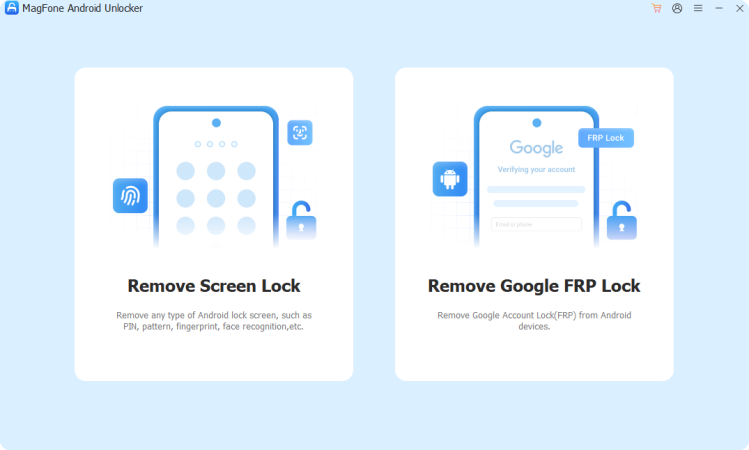
Attach your Samsung phone to a computer using a USB connection. Install and launch MagFone Android Unlocker, then choose the Remove Google FRP Lock option on the home screen.
Step 2 Choose the Brand and Android Version
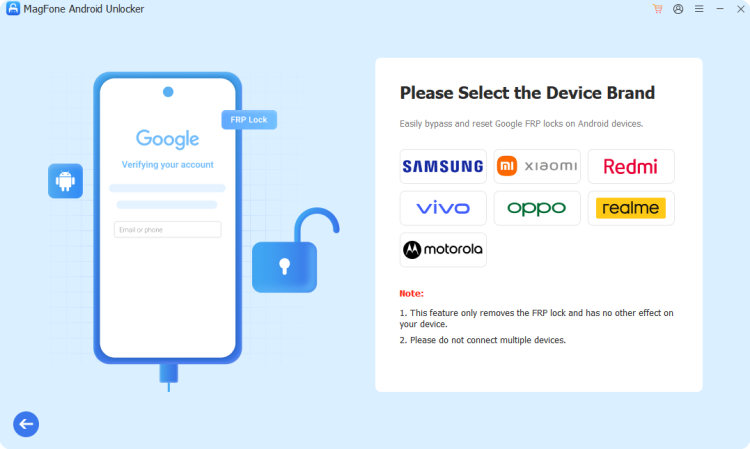
Give the program a moment to recognize your Samsung phone, or pick Samsung from the brand list manually. Next, select the Android version that matches your device, click Start, and press Continue when asked to confirm.
Step 3 Clear the FRP Lock from Your Samsung Phone
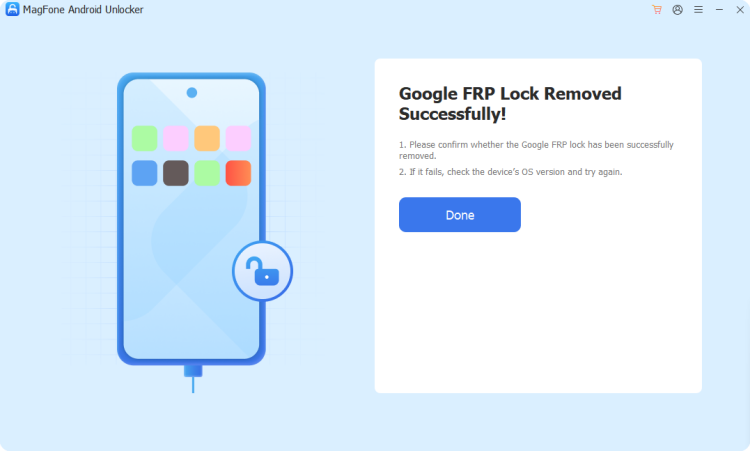
Follow the prompts shown on the computer screen and perform the matching actions on your phone. Wait while MagFone removes the FRP lock, and click Done once the process is complete.
Method 2. Recover Google Account Password
If you remember the email address but not the password, recovering the credentials can solve the problem. Once you set a new password, you can sign in with it on the locked phone, which satisfies the verification screen and lets you remove the old account. It costs nothing and needs only a browser on another device.

Step 1. Open the Google account recovery page on a computer or another phone.
Step 2. Enter the Gmail address linked to the locked phone and tap Next.
Step 3. Use a passkey to verify, or choose Try another way (use email verification code) if needed.
Method 3. Sign Out on Another Device
Google lets you sign a phone out of your account remotely, which is handy when the device is locked, lost, or in the hands of a previous owner. If you can log in to the old account from a computer, you can cut off the phone's access without touching it. Note that this signs the phone out rather than deleting the account itself.
Step 1. Log in to your Google account from a computer or another device, then go to Security & sign-in.
Step 2. Find the Your Devices section and click Manage all devices.

Step 3. Choose the phone you want to disconnect from the list of linked devices.
Step 4. Click Sign Out and confirm when Google asks again.

Method 4. Use Android Keyboard Settings
When no computer is available, the on-screen keyboard offers a workaround. It hides shortcuts that lead into the phone's Settings, letting you add a new account during setup. The process is long and requires careful tapping, so take your time, because one wrong move can force you to start over.
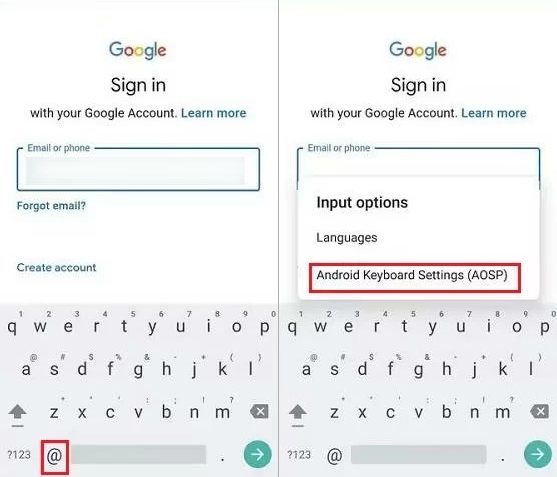
Step 1. On the account verification screen, tap the text box to bring up the keyboard.
Step 2. Press and hold the @ key, then choose Keyboard Settings.
Step 3. Open the three-dot menu in the upper-right corner, then choose Help & Feedback.
Step 4. Open Using Google Keyboard, press and hold any text, and pick Web Search.
Step 5. Enter Settings in the search field, then select the Settings app from the results.
Step 6. Go to About Phone, then tap Build Number seven times to unlock Developer Options.
Step 7. Open Developer Options and switch on OEM Unlocking.
Step 8. Restart the phone, connect to Wi-Fi, and add a new Google account when prompted.
Part 4. How to Prevent a Previously Synced Google Account on Android In the Future
Dealing with a locked phone is stressful and time-consuming, so it's far better to avoid it altogether. A few simple habits keep old accounts from causing trouble later, especially when you sell, trade, or replace a device. Here's what you can do to protect your data and avoid FRP headaches down the road.

1. Remove the Account Before Resetting
Always delete your Google account from Settings before you wipe a phone. This turns off Factory Reset Protection so the next setup goes smoothly.
2. Record Your Credentials Safely
Store your Google email and password in a trusted password manager. Having them on hand makes recovery quick if you ever get locked out.
3. Verify Secondhand Purchases
Ask the seller to sign out of their account and confirm the phone shows no linked Google account before you pay.
4. Add Recovery Options
Set up a backup email and phone number on your account. These make password recovery much easier when you need it. phones you no longer use.
Part 5. Conclusion
A previously synced Google account can turn a simple reset or purchase into a frustrating lockout. Fortunately, you have several options: remove the account through Settings before resetting, or use MagFone Android Unlocker, password recovery, remote sign-out, or keyboard settings afterward. Follow the prevention tips above, and you'll keep your Android phone secure and fully under your control.

Dylan Jones
Editor in chief





