Ever felt like your iPhone's location is a bit too "on the grid"? Whether you're trying to maintain privacy, coordinate a surprise from your desk, or simply want your Mac to act as your primary beacon in the Find My ecosystem, switching your location source is a top-tier power move. While Apple has made this process subtler in recent updates, it's far from impossible. This guide breaks down the latest practical methods to switch location from iPhone to Mac.
- Part 1. Causes of Switching Location from iPhone to Mac
- Part 2. Can I Switch My Location from iPhone to Mac?
- Part 3. How to Switch Your Location from iPhone to Mac
- Part 4. How to Switch Location from iPhone to Mac Faster
- Part 5. Conclusion
Part 1. Causes of Switching Location from iPhone to Mac
Why would someone want to shift their digital "center of the universe" from a mobile device to a stationary computer? Based on common user experiences and tech discussions, there are several practical reasons:
Privacy Management: You might want to leave your house with your iPhone but have your "Find My" location remain at home (on your Mac) so others following you see you as stationary.
Battery Preservation: Constantly broadcasting GPS data from an iPhone can drain the battery. Switching the primary location to a Mac—which is usually plugged in—saves iPhone juice.
Professional Accuracy: When working from a fixed office, your Mac provides a consistent, stable location for localized news, weather, and browser-based suggestions without the "GPS drift" sometimes seen on mobile.
Convenience: Sometimes you just want to share a specific location or coordinate a meeting directly from the device you are currently working on without reaching for your phone.
Part 2. Can I Switch My Location from iPhone to Mac?
The short answer is: Yes, but the process has changed. In the latest updates like iOS 18/26 and macOS Sonoma/Sequoia, Apple has removed the direct 'Use This Mac as My Location' button that used to sit prominently in the Find My 'Me' tab. Essentially, Apple now prioritizes your iPhone as your primary 'Live' location because it's the device you carry, making the Mac-only switch restricted for most users. However, while you can't easily 'spoof' your primary dot to your Mac with one click, you can still share your Mac's specific coordinates through other practical workarounds, which we'll break down below.
Part 3. How to Switch Your Location from iPhone to Mac
Here are the most reliable methods to transition your location sharing or change how your devices report your whereabouts.
Method 1. Switch Location from iPhone to Mac on Find My App
If your Apple ID is synced across both devices, this is the official way to tell the Find My network which device is "You."
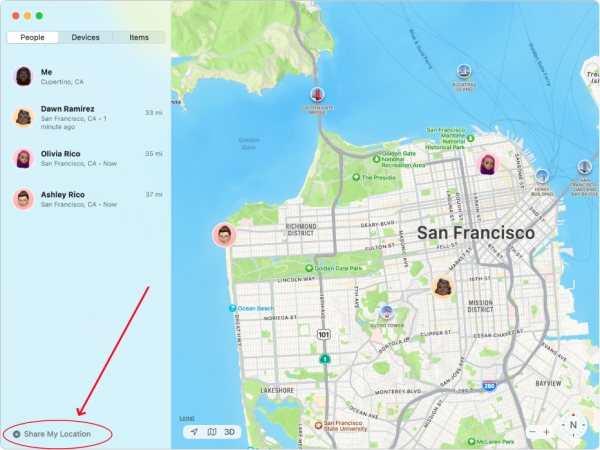
Step 1. Open the Find My app on your Mac and sign in if prompted.
Step 2. Go to the People tab and select Share My Location.
Step 3. Choose a contact from your list or enter their email or phone number.
Step 4. When prompted, confirm the sharing duration. Your location will now be shared based on the Mac instead of the iPhone.
Method 2. Switch Location from iPhone to Mac via Apple Maps
If you want your iPhone to reflect a location you've found on your Mac, you can "push" the location from the big screen to the small one.
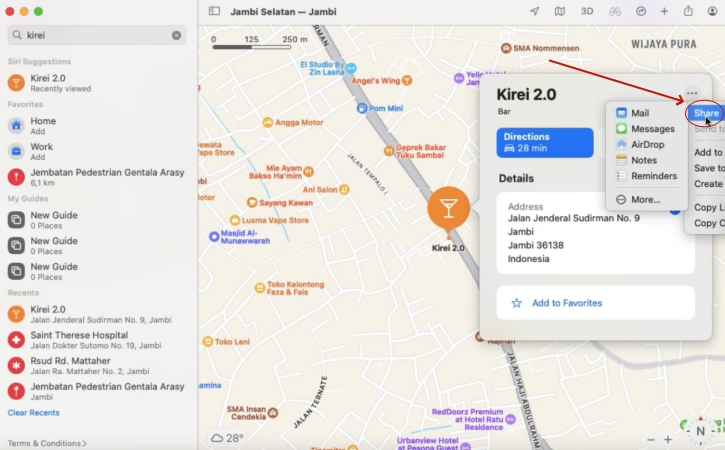
Step 1. Open Maps on your Mac.
Step 2. Search for the location you want or tap the blue dot to use your current position.
Step 3. Tap the More icon, then select Share.
Step 4. Finally, choose how you want to send the location, such as via Mail, Messages, or other apps.
Method 3. Switch Location from iPhone to Mac Using Xcode
Xcode is Apple's development environment. It allows you to virtually "set" your iPhone's location anywhere in the world using your Mac.
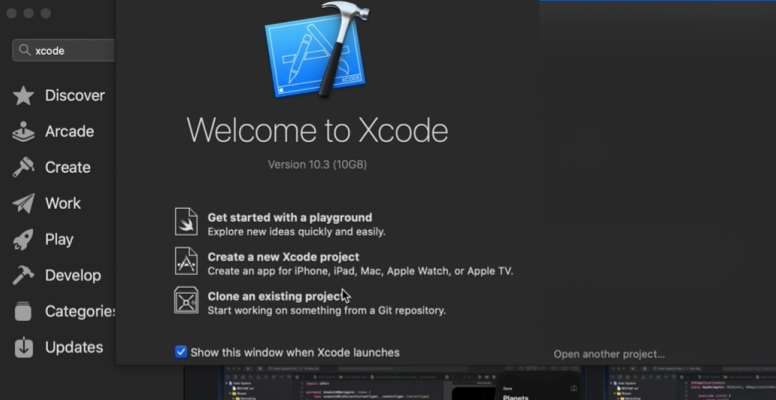
Step 1. Download and open Xcode from the Mac App Store, then connect your iPhone to your Mac using a USB cable.
Step 2. Click File > New, then select Project. Choose App and continue.
Step 3. Enter a Project Name, choose a save location, and click Create.
Step 4. At the top of the Xcode window, click the device selector and choose your connected iPhone.
Step 5. Open Signing & Capabilities, sign in with your Apple ID, then click the Run (Play) button to build the app.
Step 6. On your iPhone, trust the developer profile in Settings > General > Profiles, then return to Xcode to simulate or import a GPS location.
Part 4. How to Switch Location from iPhone to Mac Faster
Compared to the complex manual overrides of the past, MagFone Location Changer is the fastest way to sync locations now. You simply pick a spot on your Mac's map to instantly update your iPhone's coordinates. This tool effectively forces apps like Find My, Snapchat, and Pokémon GO to show your chosen location while masking your real movements. There is no jailbreaking or rooting required. Just link your iPhone to your Mac, and you have total GPS control in seconds like this.
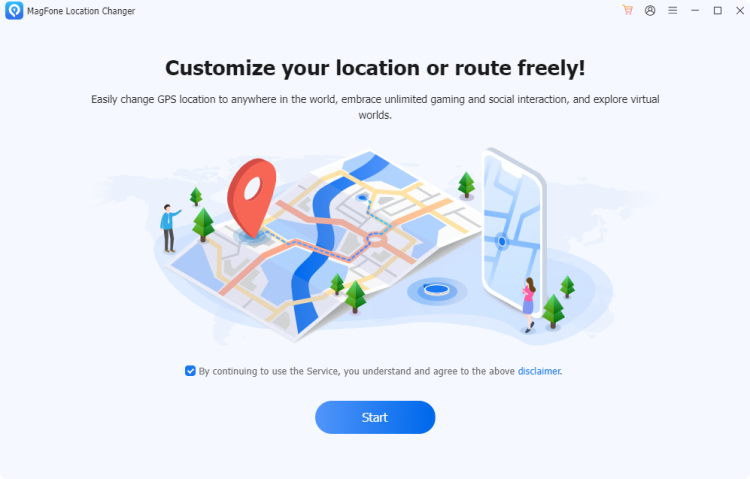
MagFone Location Changer
Easily change your GPS location on iOS and Android devices to anywhere with one click, while not requiring root or jailbreaking!
Step 1 Link Your iPhone and Launch the Software
Plug your iPhone into your Mac using a certified Lightning or USB-C cable. Open the MagFone Location Changer application on your desktop. Once the dashboard appears, look for the Change Location mode (usually the first icon on the left) and hit the Enter button to begin the synchronization process.
Step 2 Pinpoint and Apply Your New Coordinates
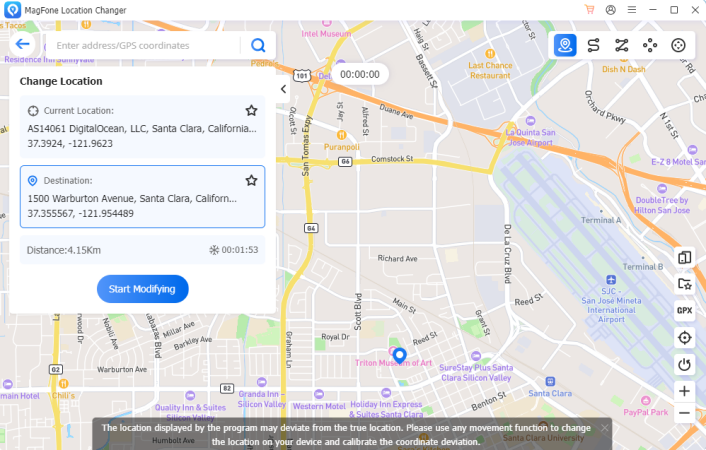
A world map will populate on your Mac screen. You can either manually drag the pin to your current Mac's physical address or type a specific destination into the search bar. Once you have identified the target area, simply click Start Modifying. Your iPhone's internal GPS will instantly "switch" to there.
Part 5. Conclusion
Switching your location from an iPhone to a Mac is a great way to manage your digital footprint and streamline your workflow. While Apple has moved away from a simple "toggle switch" in newer macOS versions, you can still achieve the same results using the Find My "Me" tab, Messages integration, or the more advanced Xcode simulation.

Olivia Wood
Editor in chief