
Seeing the error "Cannot Verify Server Identity" on your iPhone while when you're simply trying to send an email, browse Safari, or use certain apps? This common issue affects thousands of users worldwide and often occurs when you're simply trying to send an email, browse Safari, or use certain apps. Although it looks alarming, it's usually caused by mismatched certificates, expired credentials, or incorrect settings. In this guide, we'll dive deeper into the root causes and provide effective solutions to fix iPhone Cannot Verify Server Identity.
- Part 1. What Does Cannot Verify Server Identity Server Mean on iPhone?
- Part 2. How Does iPhone Handle Server Certificate Verification?
- Part 3. Why Does iPhone Keep Saying Cannot Verify Server Identity?
- Part 4. How to Fix Cannot Verify Server Identity on iPhone
- Solution 1. Restart Your iPhone
- Solution 2. Check Date and Time Settings
- Solution 3. Delete and Re-add the Email Account
- Solution 4. Update iOS to the Latest Version
- Solution 5. Reset Network Settings
- Solution 6. Disable SSL for Email Temporarily
- Solution 7. Manually Trust the Certificate
- Solution 8. Contact Your Email Provider
- Solution 9. Use Third-party Mail Apps
- Solution 10. Reset All Settings
- Solution 11. Use an iOS Repairing Tool
- Solution 12. Factory Reset iPhone
- Solution 13. Restore iPhone in Recovery Mode
- Part 5. Conclusion
Part 1. What Does Cannot Verify Server Identity Server Mean on iPhone?
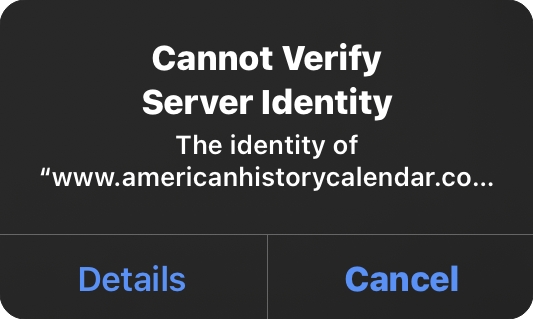
When your iPhone tries to connect to a mail server like Gmail, Yahoo, or custom domains, but it fails to validate the SSL certificate, then your iPhone will say "Cannot Verify Server Identity". The SSL certificate is responsible for establishing a secure, encrypted connection between your device and the server. If the certificate is expired, mismatched, or untrusted, your iPhone will refuse the connection, resulting in the error message.
Part 2. How Does iPhone Handle Server Certificate Verification?
Your iPhone uses SSL or TLS certificates to ensure that communication with web and email servers is encrypted and secure. During this process, the iPhone checks:
- If the certificate is issued by a trusted Certificate Authority (CA)
- If the certificate's domain name matches the one you're connecting to
- If the certificate has not expired
- Whether the certificate has been revoked
If any of these checks fail, the iPhone blocks the connection and shows the "Cannot Verify Server Identity" error.
Part 3. Why Does iPhone Keep Saying Cannot Verify Server Identity?
This error usually relates to problems with SSL certificates, which your iPhone uses to verify that your email server is secure and trustworthy. Besides SSL certificates, other causes can result in the error message. The following are common causes of the Cannot Verify Server Identify error.
Cause 1. Expired or Invalid SSL Certificate. Email or web servers sometimes use expired or self-signed certificates not recognized by iOS.
Cause 2. Domain Mismatch. The certificate might be valid for mail.example.com, but your iPhone is connecting to smtp.example.com.
Cause 3. iOS Security Updates. Recent iOS versions are stricter in enforcing SSL rules, which may cause this error even with previously working setups.
Cause 4. Public Wi-Fi or VPN Interference. Some networks use proxies that interfere with SSL certificates, causing trust issues.
Cause 5. Malware Ads or Subscribed Calendar Invites. Some users reported suspicious domains like load29.biz triggering this error.
Part 4. How to Fix Cannot Verify Server Identity on iPhone
After understanding the root causes of iPhone Cannot Verify Server Identity, it's best to determine how to fix this issue. Follow the steps below in order, from simplest to most advanced. After each fix, test to see if the error is resolved before moving to the next.
Solution 1. Restart Your iPhone
Sometimes, it's just a temporary glitch, and the simplest fix is the most effective. A reboot can clear temporary glitches in the system and mail configurations. Try turning off your device and restarting it to fix the issue.
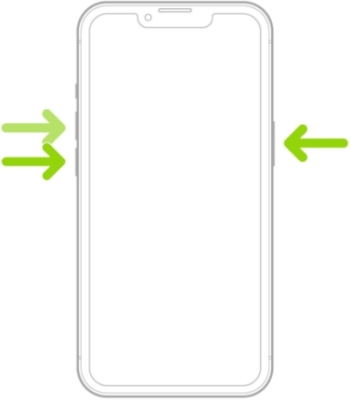
Step 1. Press and hold the side button and the volume button.
Step 2. Drag the slider to turn off your iPhone.
Step 3. Wait 30 seconds, then power it back on.
Solution 2. Check Date and Time Settings
SSL certificates rely on accurate time stamps. If your date and time on your iPhone are incorrect, verification can fail. Ensure your device is using the correct Time Zone. Also, your device is enabled with automatic time synchronization.
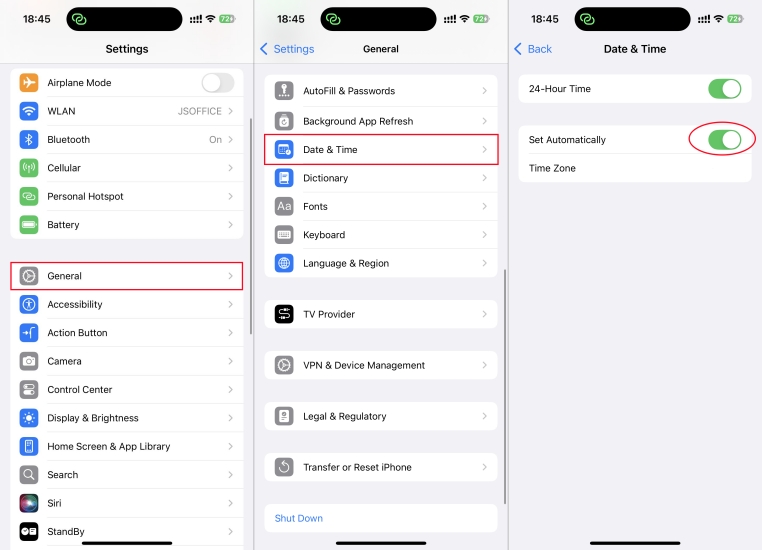
Step 1. Go to Settings > General > Date & Time.
Step 2. Enable Set Automatically.
Solution 3. Delete and Re-add the Email Account
Corrupted email configurations can trigger this error. In this case, deleting and adding the email account again is one of the most effective ways to resolve the issue. It's easy to do by following the steps below.
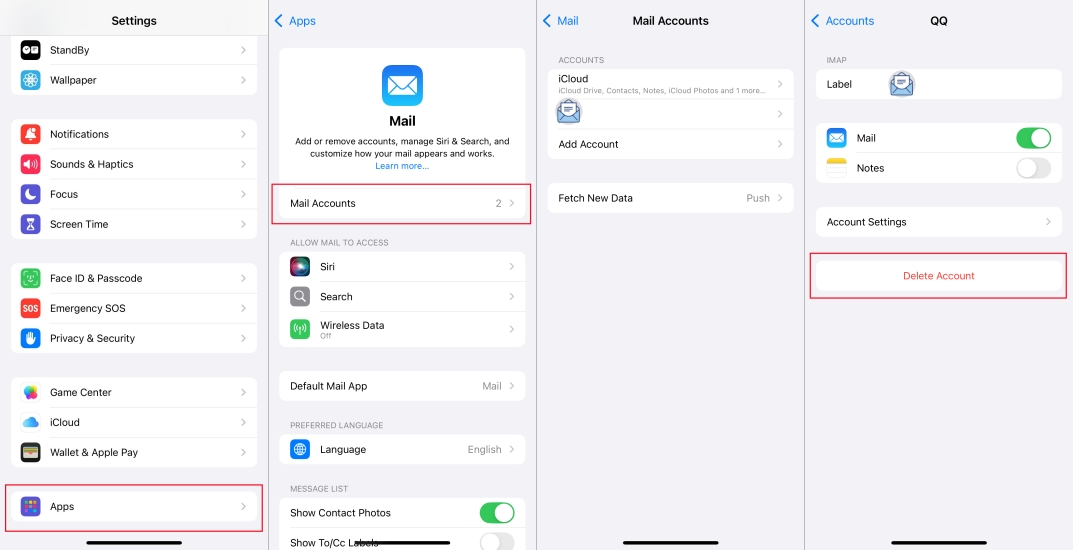
1. Open Settings and tap Apps > Mail > Mail Accounts.
2. Select the problematic account and tap Delete Account.
3. Go back to Settings > Mail > Accounts.
4. Tap Add Account and choose the correct email provider.
Solution 4. Update iOS to the Latest Version
Outdated iOS versions can cause SSL errors due to incompatibility with newer certificates. Apple often releases patches to fix SSL and certificate handling bugs. Make sure that your iPhone is running the latest version of iOS.
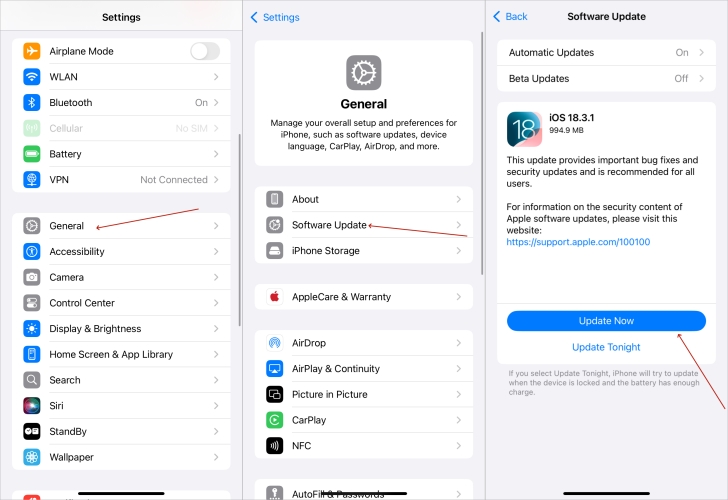
Step 1. In Settings, tap General > Software Update.
Step 2. Tap Download and Install if an update is available.
Solution 5. Reset Network Settings
Misconfigured or corrupted network settings can interfere with server verification. Resetting network settings clears outdated DNS or proxy settings that may interfere, but this will erase saved WiFi passwords and VPN settings.
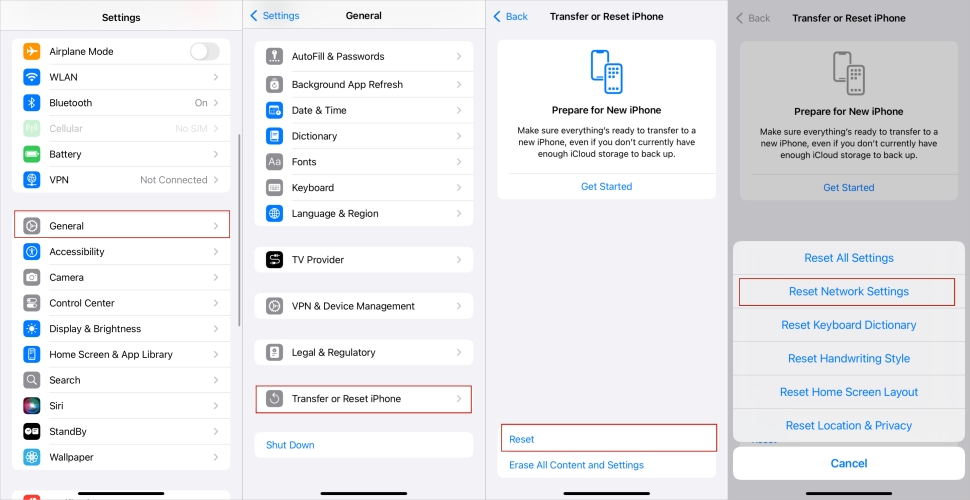
Step 1. Go to Settings > General > Transfer or Reset iPhone.
Step 2. Tap Reset > Reset Network Settings.
Step 3. Enter your passcode and tap Reset to confirm.
Solution 6. Disable SSL for Email Temporarily
If you're in urgent need of access, you can disable SSL manually, which can temporarily bypass the error. But it is not recommended to toggle SSL off for long-term use due to security risks. Only use this if you trust the mail server and re-enable SSL soon after resolving the issue.
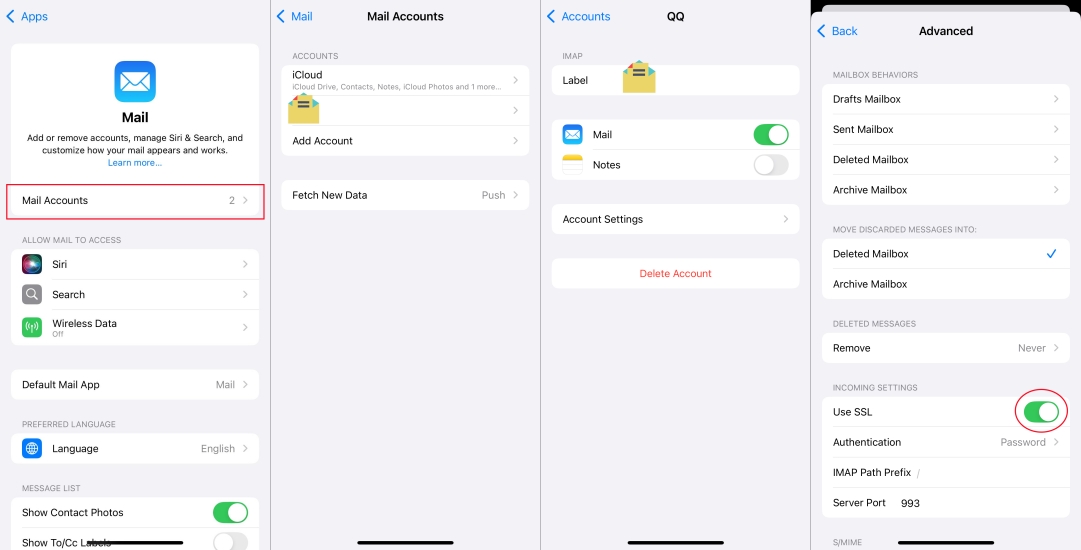
Step 1. On your iPhone, head to Settings > Apps and tap Mail.
Step 2. Tap Mail Accounts and select your mail account.
Step 3. Tap Account Settings > Advanced.
Step 3. Toggle off Use SSL, then go back and save changes.
Solution 7. Manually Trust the Certificate
In some cases, users are allowed to manually trust a certificate—typically used in managed or enterprise environments. If you're using a private server or corporate email, you may need to manually trust the certificate.
Solution 8. Contact Your Email Provider
If you're using a work or school email, the issue might lie in the server configuration. In such cases, ask your IT admin to confirm that the SSL certificate is valid, then ensure IMAP or SMTP ports are correctly set. Also, confirm that the server name matches the certificate domain.
Solution 9. Use Third-party Mail Apps
Some third-party apps like Outlook for iOS, Spark Mail, and Airmail can handle SLL validation differently and provide temporary relief. If you're waiting for a certificate issue to be fixed on the server side, consider using these apps on your iPhone.
Solution 10. Reset All Settings
Resetting all settings on your iPhone may help in fixing the issue. This will reset system settings like display, sound, and WiFi, but won't erase any data on your device. If the above methods fail, try to reset all settings on your device.
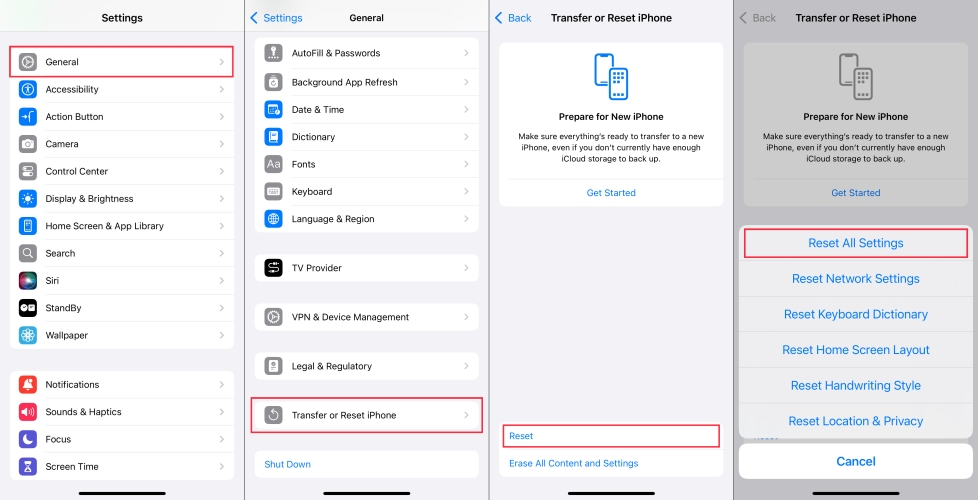
Step 1. Navigate to Settings > Genera > Transfer or Reset iPhone.
Step 2. Tap Reset > Reset All Settings.
Step 3. Enter your passcode and tap Reset to confirm.
Solution 11. Use an iOS Repairing Tool
When basic troubleshooting steps cannot help you in fixing the issue, consider a professional iOS repairing tool like MagFone iOS System Recovery. It is a reliable iOS repairing software designed to fix various iOS and iPadOS issues, including the persistent "Cannot Verify Server Identity" error. With this tool, you can fix the issue easily and efficiently while not losing any data.
MagFone iOS System Recovery
Fix various iOS and iPadOS system issues, such as black screen, boot loop, frozen screen, or stuck on Apple logo, without data loss.
Step 1 Open MagFone Software and Connect iPhone
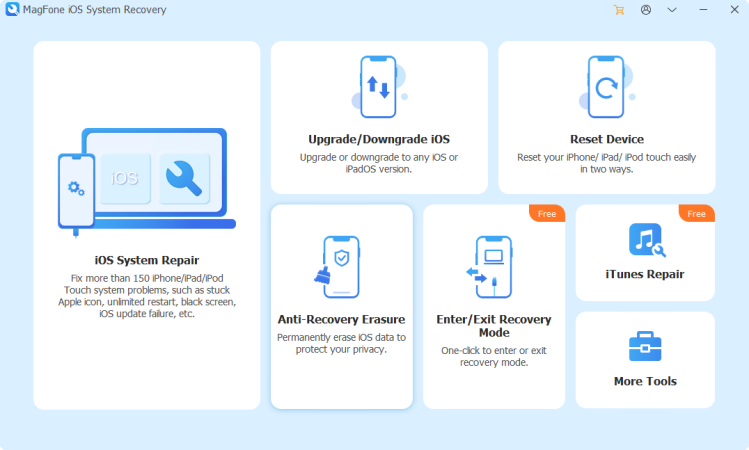
Plug your iPhone into your computer through a USB cable, then launch MagFone iOS System Recovery and click the iOS System Repair button.
Step 2 Go to Put iPhone into Recovery Mode
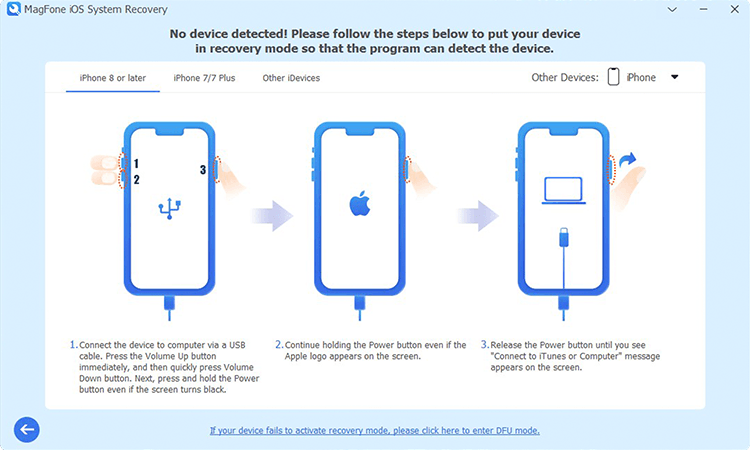
Make sure that you have turned your iPhone off. Then follow the onscreen instruction to put your iPhone into recovery mode. If your device fails to activate recovery mode, you can make your device into DFU mode.
Step 3 Download the Firmware Package for iPhone
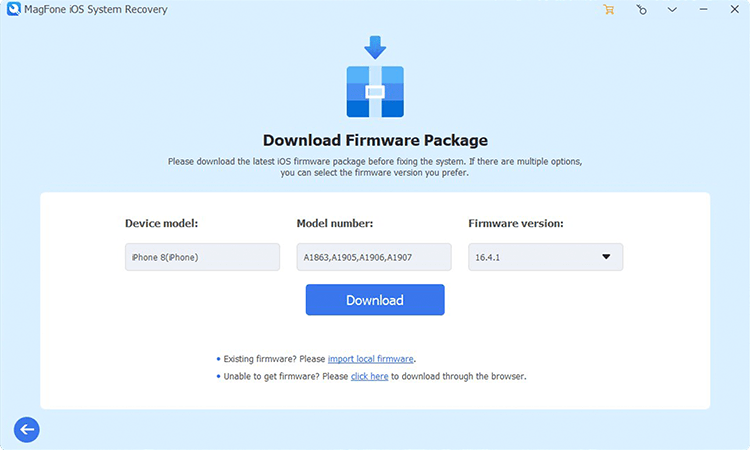
After your device is detected by MagFone software, you can check the device information appearing on the screen. Manually correct the device information and click the Download button to get the firmware package for your device.
Step 4 Fix iPhone Cannot Verify Server Identity
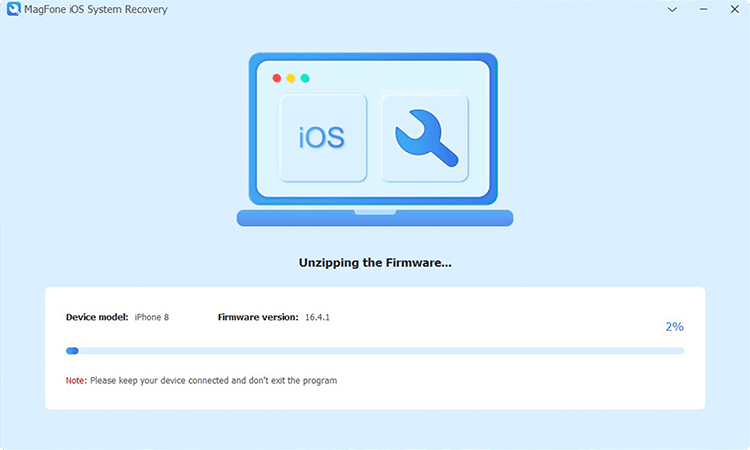
When the firmware package is downloaded to your computer, click the Repair button to start fixing Cannot Verify Identity. Wait for a while, and your device will automatically reboot.
Solution 12. Factory Reset iPhone [Data Loss]
Backing up your iPhone and performing a full reset may help resolve deep-level software issues. This method also works for fixing your iPhone saying Cannot Verify Server Identity. Before starting, make sure that Find My iPhone is disabled or remember your Apple ID password.
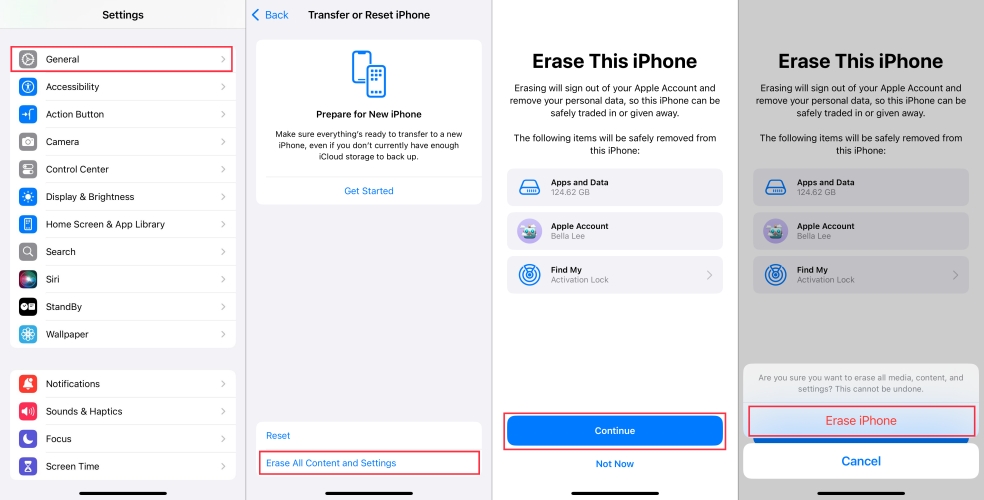
Step 1. Run into Settings and tap General > Transfer or Reset iPhone.
Step 2. Tap Erase All Content and Settings > Continue.
Step 3. Enter your Apple ID password and tap Turn Off.
Step 4. Proceed to tap Erase to start resetting your device.
Solution 13. Restore iPhone in Recovery Mode [Data Loss]
If the over-the-air update is taking forever, consider using a wired method via iTunes on a PC or Finder on a Mac. With the help of iTunes or Finder, you can update your iPhone within several minutes. Here's how to.
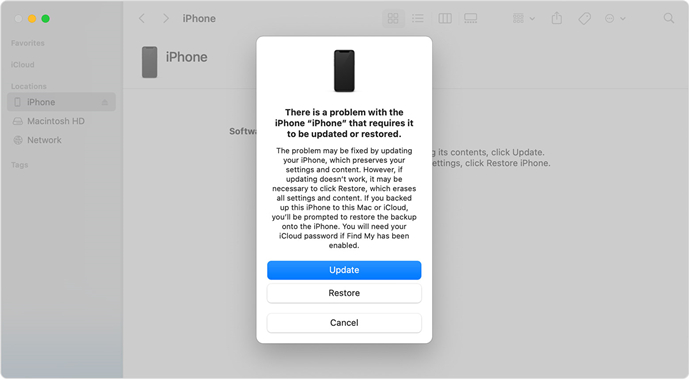
Step 1. Connect your iPhone to your computer through a USB cable.
Step 2. Open iTunes or Finder, then put your device into recovery mode.
Step 3. In the pop-up window, click Restore to perform a restoration.
Part 5. Conclusion
The "Cannot Verify Server Identity" error on iPhone is frustrating — but in most cases, it's usually easy to fix once you understand what's happening behind the scenes. Whether updating your device, removing and re-adding your email account, or using a third-party tool like MagFone iOS System Recovery, you can regain control your email access while keeping your data secure. Have you resolve this issue using the step-by-step methods above? Let us know in the comments!

Dylan Jones
Editor in chief