Both on the Apple Community and on Reddit, we have found numerous threads about iPhone users deleting photos from iPhone and they reappear. However, dealing with deleted iPhone photos that keep reappearing can be frustrating. Imagine going through the effort of cleaning up your photo library, only to see those deleted photos pop up like unwanted guests. Not only is it annoying, but it can also take up valuable storage space on your device. In this article, we will explore why this happens and how to fix iPhone photos reappear after deleting for good.
- Part 1. Why Do Deleted Photos Reappear on iPhone?
- Part 2. How to Stop Deleted iPhone Photos from Reappearing
- Part 3. How to Fix Deleted Photos on iPhone Keep Coming Back
- Solution 1. Force Restart iPhone
- Solution 2. Remove and Reinstall Photos
- Solution 3. Manage Storage for iCloud Photos
- Solution 4. Sign Out and Back Into iCloud
- Solution 5. Update iPhone to iOS 17.5.1s
- Solution 6. Reset All Settings on iPhone
- Solution 7. Use MagFone iOS System Recovery [No Data Loss]
- Solution 8. Factory Reset iPhone [Data Loss]
- Solution 9. Restore iPhone via iTunes [Data Loss]
- Solution 10. Repair iPhone in Recovery Mode [Data Loss]
- Solution 11. Contact Apple Support
- Part 4. FAQs about Photos on iPhone
- Part 5. Conclusion
Part 1. Why Do Deleted Photos Reappear on iPhone?
The issue was widely discussed after a Reddit user posted a now-deleted thread alleging that those deleted photos reappeared on an iPad they sold to a friend, despite the iPad having been erased prior to selling it. By far, still lots of threads about deleted photos on iPhone keep coming back have been found on Reddit. In fact, when you delete photos from your iPhone, they're supposed to go away for good, right? Well, not always. Several underlying factors could cause those pesky photos to reappear.


Reason 1. Database Bug
Occasionally, the iOS SQLite database that tracks your media becomes corrupted. Even if a file is marked for deletion, a system re-index might find the "orphaned" file on your storage and put it back in your gallery.
Reason 2. iCloud Sync Loops
If you delete a photo on your iPhone while it has a poor connection, but the photo exists on your iPad or Mac, the cloud may "resolve" the conflict by pushing the version it still sees as active back to your phone.
Reason 3. Third-party Apps
Third-party apps like Google Photos or OneDrive often have their own "Trash" logic. If these apps have permissions to write to your System Photos, they may re-sync a backup back into your local Apple Photos.
Part 2. How to Stop Deleted iPhone Photos from Reappearing
If you've ever deleted a photo only to have it pop back into your gallery minutes or days later, don't fret. Before fixing this issue, you can try stopping deleted iPhone photos from reappearing first. Here are several methods to prevent deleted photos on iPhone from reappearing.
Solution 1. Empty the "Recently Deleted" Bin
When you delete a photo, it first moves to the "Recently Deleted" album, where it stays for 30 days. Make sure to permanently delete photos from this album to prevent them from reappearing. To fix the issue, you can clear the "Recently Deleted" album on your iPhone.
Option 1. Clear Recently Deleted Album in Photos

Step 1. Open Photos and scroll down to the Collections area.
Step 2. Find and tap the Recently Deleted album at the bottom.
Step 3. Unlock your Recently Deleted album with Face ID or your passcode.
Step 4. Tap Select, then tap the three-dot icon in the top right corner.
Step 5. Tap Delete > Delete From This iPhone to confirm.
Option 2. Clear Recently Deleted Album in Settings
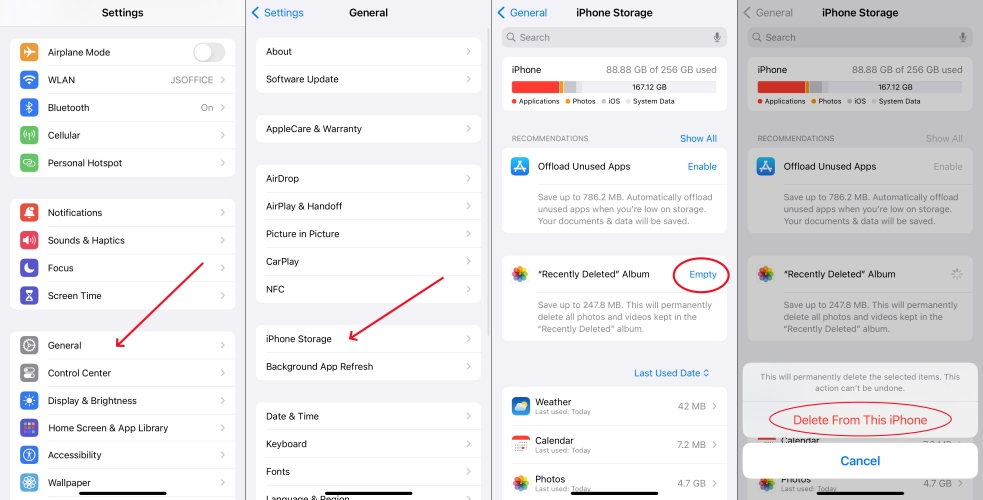
Step 1. Open Settings on your iPhone and tap General.
Step 2. Tap iPhone General, then tap Empty next to "Recently Deleted" Album.
Step 3. Tap Delete From This iPhone to confirm.
Solution 2. Disable and Enable iCloud Photos
Turning iCloud Photos off and then back on can reset the synchronization process. If your photos appear on your iPhone again after deleting, you can toggle off iCloud Photos to temporarily disable this feature. Wait a few minutes, then toggle it back on.
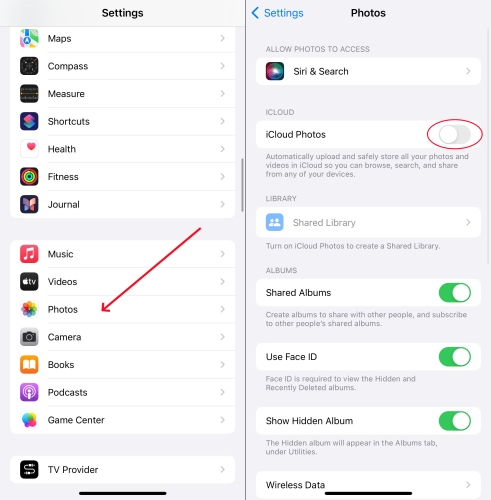
Step 1. In Settings on your iPhone, tap Photos.
Step 2. Under Photos, toggle off iCloud Photos.
Step 3. Wait a few minutes, and toggle it back on.
Solution 3. Turn Off "Shared With You" Content
Sometimes, photos you delete aren't actually "photos". Maybe they are images sent to you in Messages that iOS is automatically putting back in your library. To prevent iPhone pictures coming back after deleting, disable "Share With You" in the Message settings.
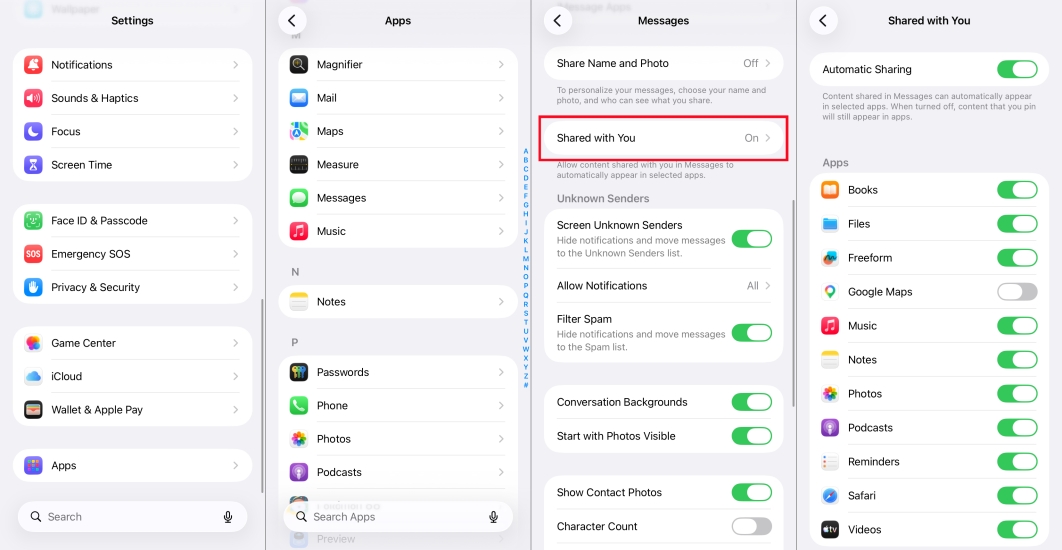
Step 1. Open Settings > Apps > Messages and look for Shared With You.
Step 2. Toggle off Automatic Sharing or disable Photos to share.
Solution 4. Use Apple Intelligent to Clean Photos
If your iPhone is running iOS 18 or 26, you can use the built-in Apple Intelligence to find hidden duplicates or corrupted files that keep resurfacing. With the built-in feature, you can clean "zombie" files in the Photos app thoroughly and quickly.

Step 1. Swipe down on your Home Screen to open Search.
Step 2. Type: "Find and delete reappeared duplicates."
Step 3. Wait for Apple Intelligence to scan your library for files.
Step 4. Review the results and tap Clean Up All.
Solution 5. Delete Photos in Hidden Album
The Hidden album will appear in the Albums tab, under Utilities. If you turn on Show Hidden Album, you will find some photos that you don't want to keep appear in your Photo Library. So you can go to turn on Show Hidden Album and delete some unused photos, then turn off Show Hidden Album again.
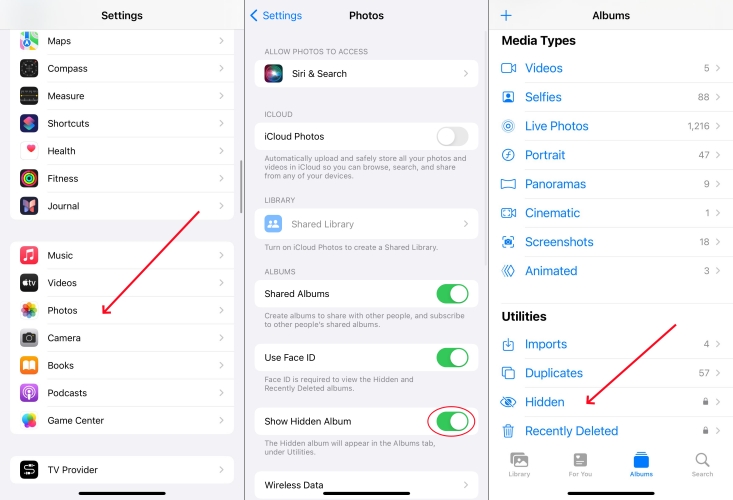
Step 1. Navigate to Settings > Photos and toggle on Show Hidden Album.
Step 2. Open Photos and tap Collections > Hidden to view your hidden album.
Step 3. Select unwanted photos to delete and go back to disable Show Hidden Album.
Solution 6. Check Third-Party Applications
If you have Google Photos or OneDrive installed on your iPhone, they might be "restoring" your photos. If those apps have a backup of the photo you just deleted on your iPhone, they may sync it back to your device. Just delete it inside the Google Photos app.
Part 3. How to Fix Deleted Photos on iPhone Keep Coming Back
After stopping deleted photos on the iPhone from reappearing, you can fix the issue that iPhone photos reappear after deleting. There are both basic and advanced troubleshooting steps to fix the issue. Those works for fixing the issue, but some would delete all the data and settings on your iPhone. Before starting, back up your iPhone first.
Solution 1. Force Restart iPhone
A simple restart can sometimes solve the problem. It refreshes the system and can clear minor glitches that might be causing the issue.

iPhone X and later:
1) Press and hold either volume button and the side button until the power-off slide appears.
2) Drag the slider, then wait 30 seconds for your iPhone to turn off.
3) Press and release the side button until the Apple logo appears.
iPhone 6, 7, 8 or SE (2nd generation):
1) Press and hold the side button until the power-off slider appears.
2) Drag the slider, then wait 30 seconds for your iPhone to turn off.
3) Press and hold the side button to turn your device back on.
iPhone SE (1st generation) or earlier:
1) Press and hold the top button until the power-off slider appears.
2) Drag the slider, then wait 30 seconds for your iPhone to turn off.
3) Press and hold the top button to turn your device back on.
Solution 2. Remove and Reinstall Photos
A problematic app might be interfering with your photos. If there is a problem with the Photos app on your iPhone, you would encounter that deleted photos appear again. To completely resolve the issue, you can remove the Photos app on your iPhone.
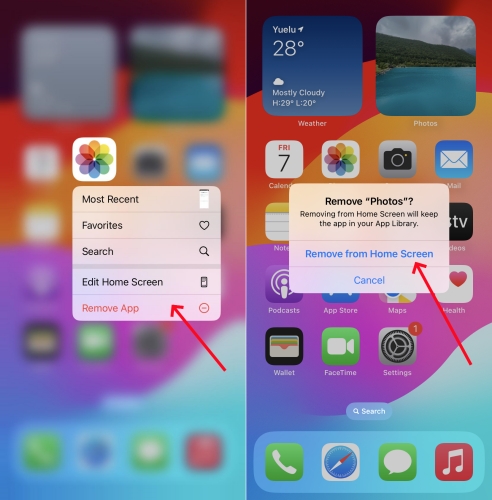
Step 1. Locate the home screen on your iPhone and hold Photos.
Step 2. Tap Remove App > Remove from Home Screen.
Solution 3. Manage Storage for iCloud Photos
If you have enabled iCloud Photos on your iPhone, those photos will be automatically synced to iCloud before deleting. Then once when syncing is on, your iCloud Photos will appear in your Photo Library, including those deleted photos. In this case, you can optimize your iCloud Photos.
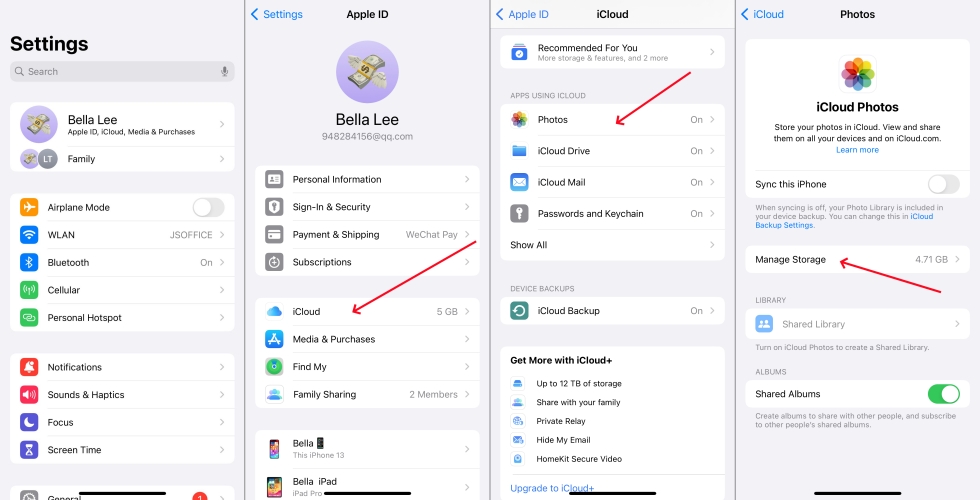
Step 1. Launch the Settings app and tap your Apple ID name.
Step 2. Select iCloud and tap Photos.
Step 3. Tap Manage Storage, then tap Turn Off and Delete from iCloud.
Solution 4. Sign Out and Back Into iCloud
Signing out of iCloud and then signing back in can sometimes clear out the glitch causing the problem. This method works for resolving some problems arisen from iCloud synchronization. To fix iPhone deleted photos reappear, you can sign out and back into iCloud.
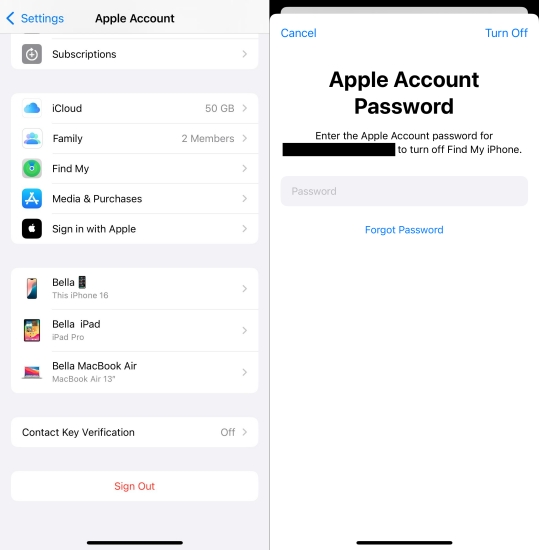
Step 1. Go to Settings > your Apple ID name on your iPhone.
Step 2. Scroll down to tap Sign Out, then enter your Apple ID password.
Step 3. Tap Turn Off to confirm and sign back in after a few minutes.
Solution 5. Update iPhone to the Latest iOS
It was a rare problem where deleted photos reappear on an iPhone after updating to iOS 17.5. To address this problem, Apple has released some new updates like iOS 18 and iOS 26. In this case, you can try installing the latest iOS on your iPhone to fix the issue.
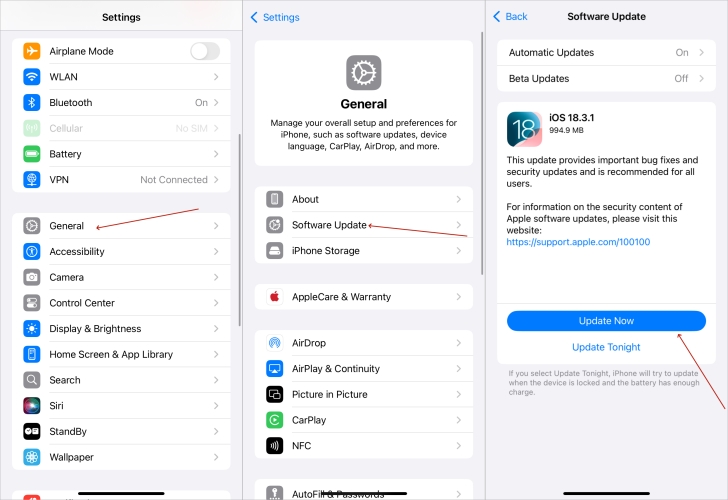
Step 1. Head to Settings and tap General > Software Update.
Step 2. Tap Download and Install to download the latest iOS.
Step 3. After downloading the update, enter your screen lock passcode.
Step 4. Tap Update to install the latest iOS on your iPhone.
Solution 6. Reset All Settings on iPhone
Resetting all settings can clear out any configurations that might be causing the issue. This won't delete your data, but it will reset your system settings. When there is a problem with your iPhone, you can reset all settings on your iPhone to fix the issue.
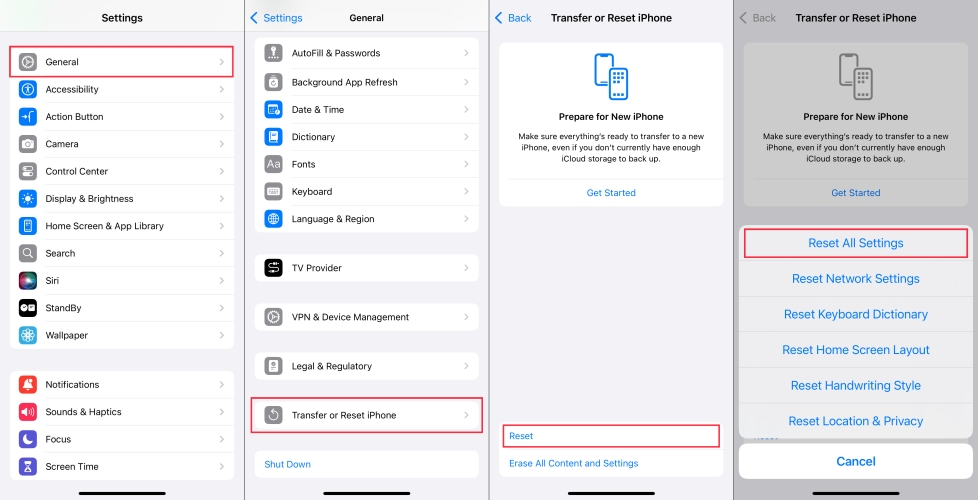
Step 1. Go to Settings > General > Transfer or Reset iPhone.
Step 2. Tap Reset and select Reset All Settings.
Step 3. Tap Reset All Settings to confirm.
Solution 7. Use MagFone iOS System Recovery [No Data Loss]
To avoid the data loss, you are suggested to fix that iPhone photos reappear after deleting through MagFone iOS System Recovery. Unlike those iOS repairing tools on the internet, MagFone iOS System Recovery is designed to resolve various system issues without data loss. There are two modes to fix the system issue, and repairing the issue in Standard Mode won't cause data loss. Here's how to resolve the issue with MagFone iOS System Recovery.
MagFone iOS System Recovery
Fix various iOS and iPadOS system issues, such as black screen, boot loop, frozen screen, or stuck on Apple logo, without data loss.
Step 1 Link Your iPhone to Your Computer
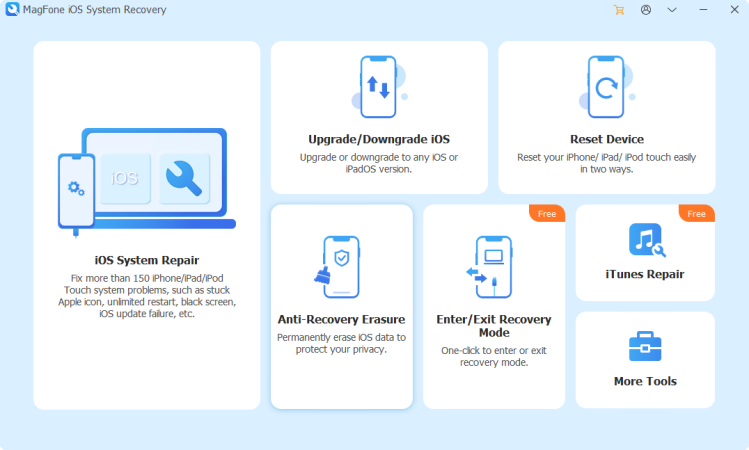
First of all, use a USB cable to connect your iPhone to your computer. Then run MagFone iOS System Recovery on the computer and select iOS System Repair.
Step 2 Put Your iPhone into Recovery Mode
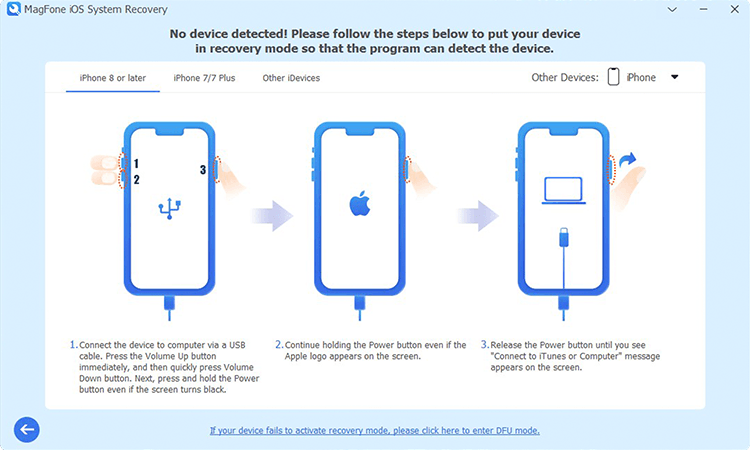
After selecting Stand Repair Mode, you need to put your iPhone into recovery mode or DFU mode. If you don't know how to, just follow the onscreen instruction.
Step 3 Download and Verify the Download Firmware
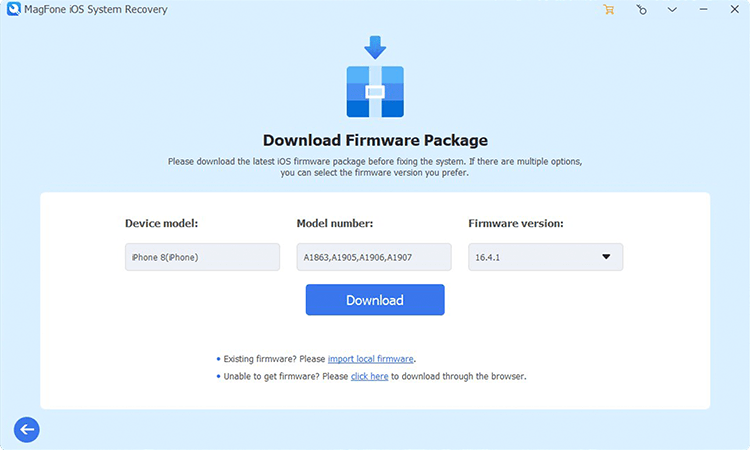
Proceed to check the device information shown on the screen. Then select the firmware version and click the Download button to download the firmware package.
Step 4 Start to Fix the Issue without Data Loss
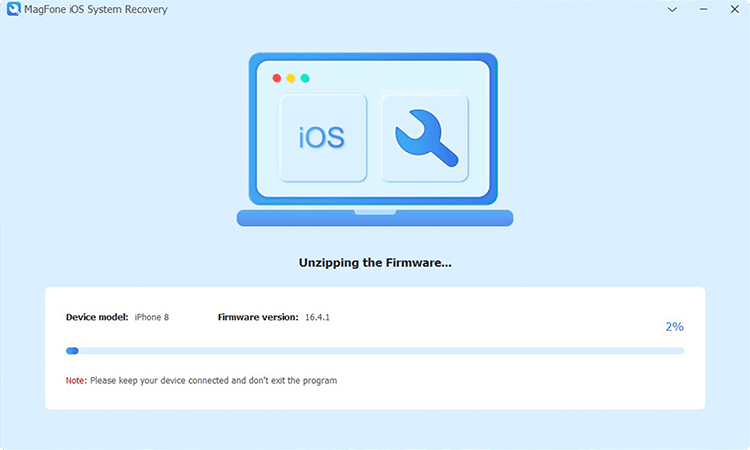
Go to unzip and verify the firmware package by clicking the Repair button. After that, MagFone software will continue to resolve that those photos reappearing on the iPhone after deleting.
Solution 8. Factory Reset iPhone [Data Loss]
When you reset your device to factory settings, all the data and setting on your iPhone will be erased, but many of the mirror bugs and issues will be fixed. A factory reset returns your iPhone to the way it was when you first took it out of the box. Be sure to back up all of the files on your iPhone before starting the factory reset, or they'll be gone for good. Once you've backed up, you can follow these steps to factory reset your iPhone.
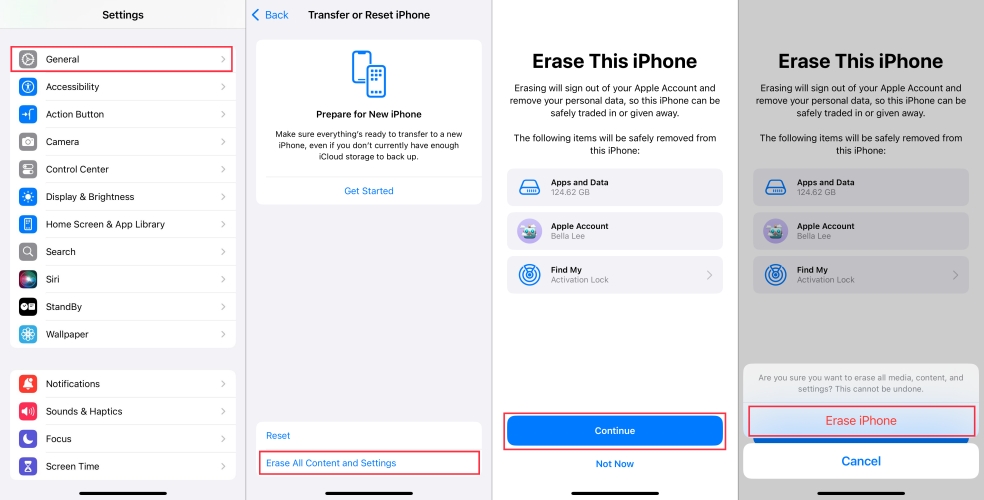
Step 1. On your iPhone, tap Settings > General > Transfer or Reset iPhone.
Step 2. Tap Erase All Content and Settings, then tap Continue.
Step 3. Skip iCloud Backup and enter your screen lock passcode or Apple ID password.
Step 4. Tap Erase to confirm that you want to factory reset your device.
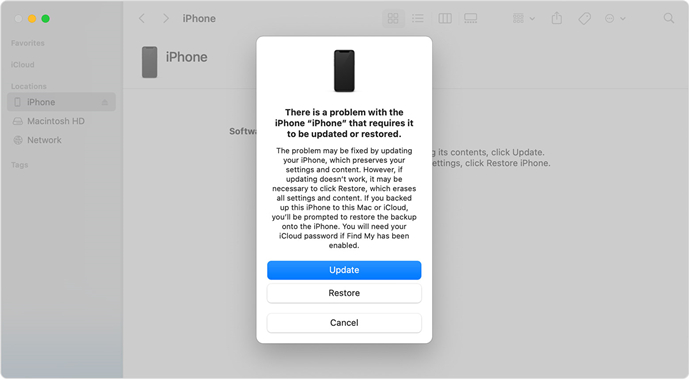
Solution 9. Restore iPhone via iTunes [Data Loss]
Compared to performing a factory reset directly, restoring your iPhone via iTunes on a PC or the Finder on a Mac can help you resolve any issues. It also will erase all the data and settings on the device, so make a backup of your iPhone in advance. You need to do the following if you use iTunes or the Finder to restore your iPhone.
Step 1. Connect your iPhone to your computer through a USB cable.
Step 2. Tap Trust This Computer on your device and enter your screen passcode.
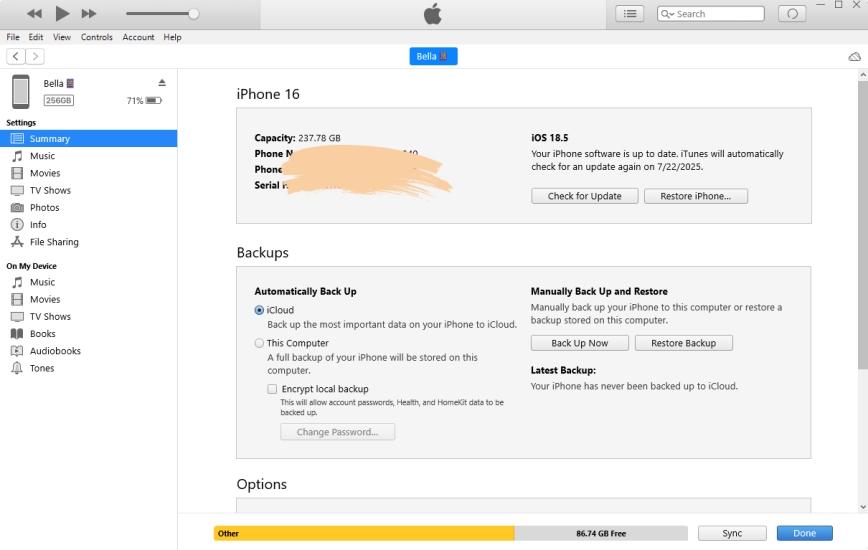
Step 3. Go back to the computer and click the device icon in iTunes.
Step 4. Click the Summary tab and click the Restore iPhone button.
Step 5. Wait to back up your iPhone, then click the Restore button to confirm.
Solution 10. Repair iPhone in Recovery Mode [Data Loss]
If you cannot remember your screen lock passcode or have Find My iPhone enabled, you can restore your iPhone in recovery mode to fix the issue. A recovery mode restore is a deep restore method that can fix complex issues. It's a bit technical, so follow a detailed guide as below. To avoid your data loss, you can back up your iPhone first.
Step 1. Power off your iPhone and connect it to a computer.
Step 2. Put it into recovery mode by pressing the correct button.
- iPhone 8 or later: Press and quickly release the volume up button. Press and quickly release the volume down button. Then, press and hold the side button until you see the Connect to computer screen.
- iPhone 7 and 7 Plus: Press and hold the top and volume down buttons at the same time. Keep holding them until you see the Connect to computer screen.
- iPhone 6s or earlier: Press and hold both the Home and the top buttons at the same time. Keep holding them until you see the Connect to computer screen.
Get an iPad, iPhone, or iPod touch into recovery mode with one click for free.
Step 3. Open iTunes or the Finder on your computer, then click your iPhone icon.
Step 4. In the pop-up window, click the Restore button to wait the Restore completes.
Solution 11. Contact Apple Support
When all else fails, reaching out to Apple Support might be your best option. Here you can contact Apple Support online or visit an Apple retail store. Then you get further troubleshooting and potential fixes. Your iPhone will be fixed as soon as possible.

Part 4. FAQs about Photos on iPhone
How to access deleted photos on iPhone?
To access deleted photos on your iPhone, you can find them in your Recently Deleted album for 30 days. After 30 days, they'll be permanently deleted. But all the deleted photos can be find in iCloud Photos provided that you have enabled iCloud Photos on your iPhone.
Where do deleted photos go on iPhone?
All permanently deleted photos on your iPhone are gone. But when you don't choose to permanently delete your photos, they will remain in the Recently Deleted album for 30 days.
How to recover permanently deleted photos from iPhone?
It is not easy to recover permanently deleted photos from an iPhone. Provided that you have synced your iPhone with a computer or iCloud, you can restore those permanently deleted photos from iTunes or iCloud backups. If not having any backup, you can use iPhone photo recovery software like MagFone iPhone Data Recovery to get deleted iPhone photos back.
How to recover recently deleted photos on iPhone?
If you accidentally delete some photos on your iPhone, you have 30 days to get it back from your Recently Deleted album. You can go to recover it in Recently Deleted, then they go back to your Photo Library.

Step 1. Open Photos and tap the Collections tab on your iPhone.
Step 2. Under Utilities, tap the Recently Deleted album.
Step 3. Use Face ID or Touch ID to unlock your Recently Deleted album.
Step 4. Tap Select and choose the photo that you want to recover.
Step 5. Tap Recover > Recover Items to confirm.
Part 5. Conclusion
It can be a headache to deal with deleted photos that appear on your iPhone. But with the right steps introduced in this guide, you can fix it with ease. From basic troubleshooting to advanced solutions, there are multiple ways to tackle this problem. To quickly and efficiently fix this problem, you are suggested to use MagFone iOS System Recovery. Have a try, and you'll find it out.

Dylan Jones
Editor in chief