








An iCloud lock, also known as Activation Lock, is a security feature created by Apple, which prevents an iPhone or iPad from being used without the correct Apple Account credentials. When Find My is enabled on the iPhone or iPad, the feature starts immediately. If the device is lost, users can remotely lock it through the iCloud Activation Lock. However, if you bought a second-hand iPhone or have forgotten your Apple ID password, you can turn to DNS for iCloud bypass. So, how can you do that specifically? Here we will teach you how to apply a DNS server for iCloud bypass step-by-step and some better solutions for iCloud locked iPhones.
- Part 1. What Is iCloud DNS Bypass?
- Part 2. How to Bypass iCloud by DNS on iPhone & iPad
- Part 3. Better Solutions for iCloud Locked iPhones
- Part 4. FAQs about iCloud DNS Bypass
- Part 5. Conclusion
Part 1. What Is iCloud DNS Bypass?
The full name of DNS is Domain Name System, a service of the Internet that enables people to access the Internet more easily. The main function of DNS is to convert domain names into IP addresses. Each device connected to the Internet has a unique IP address. Most know the DNS is from a port where DNS is mentioned as one method to bypass iCloud. However, most users may be unfamiliar with DNS for iCloud bypass. No matter, here we'll explore this method.
What Is iCloud DNS Bypass?
iCloud DNS Bypass is an unofficial workaround that attempts to redirect a device's internet connection during the iOS setup process. By altering the device's DNS settings, users can temporarily bypass the iCloud Activation Lock on the iPhone and iPad, having limited access to certain features without completing the Activation Lock process.
What iCloud DNS Bypass Can and Cannot Do?
Applying a DNS server to bypass iCloud is more suitable for users to unlock a second-hand iPhone or iPad locked by the previous owner because it require the original Apple ID and password. But before using DNS for iCloud bypass, understanding limitations is crucial for avoiding misinformation.
 What It Might Do
- Load partial web-based interface on older devices
- Provide temporary access to basic internet features
- Display informational screens instead of full setup

- Remove iCloud Activation Lock
- Unlock iPhone permanently
- Allow normal Apple ID sign-in bypass
- Enable full iOS functionality like calls, apps, and iMessage
- Work reliably on modern iOS versions
📌 Important clarification:
This does not remove Activation Lock from Apple's servers. It only attempts to modify what the device loads temporarily during setup. And it is only workable on devices running iOS 8, 9, and 10. For better solutions, you can turn to Part 3 to find more details.
Part 2. How to Bypass iCloud by DNS on iPhone & iPad
When an iPhone activates, it must connect to Apple's servers to verify Apple ID credentials, Activation Lock status, and device ownership eligibility. The DNS bypass method tried to change DNS settings during WiFi setup, redirect activation requests to alternative servers, and load a limited menu-like interface instead of the official activation screen. Here is how to bypass iCloud with DNS on a locked iPhone or iPad.
2.1 How to Bypass iCloud Lock Using DNS (Video Demo)
Before following the step-by-step instruction, you can watch a video instruction first, then start to bypass iCloud with DNS.
Step 1. Turn on your iPhone or iPad, then choose your country and language on the screen
Step 2. Press on Continue to the Wi-Fi settings page.
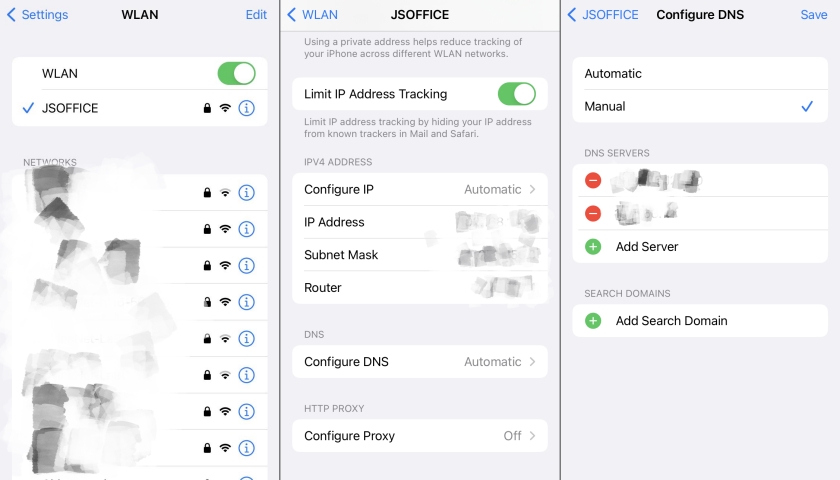
Step 3. Then find and tap on the "i" icon beside the Wi-Fi you choose.
( If you have connected the Wi-Fi, touch on Forget this Network to disconnect your device from the network.)
Step 4. Next, you should enter a DNS server IP address like this:
- Asia: 104.155.28.90
- USA: 104.154.51.7
- Europe: 104.155.28.90
- South America: 35.199.88.219
- Australia and Oceania: 35.189.47.23
- Other Countries: 78.100.17.60
Step 5. Now, enable Wi-Fi and choose a network you like from the Wi-Fi list. Input the password to connect to that network.
Step 6. Tap on Back, and you'll find the iPhone entering into the iCloud Bypass page.
Step 7. Scroll down and click on Activation help, and you can use your iPhone now.
2.2 How to Unlock All Features after DNS iCloud Bypass [Further Tips]
If you want to unlock all the features on your device after DNS bypass, then you can follow the steps below.
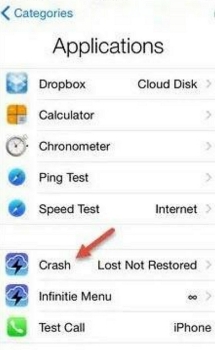
Step 1. Once the previous steps are completed, tap Menu and choose Applications.
Step 2. Find and press the Crash option to force your device to restart automatically.
Step 3. After your device reboots, select your Language and Region when prompted.
Step 4. On the Wi-Fi Network Selection screen, tap the Home button and navigate to More Wi-Fi Settings.
Step 5. Pick the "i" icon next to your Wi-Fi, then go to Menu > HTTP Proxy.
Step 6. Delete the existing HTTP address. Then type 30 distinct emoji icons in the Server part and input 8888 in the Port section.
Step 7. Select Back and then Next. You will be directed to the unlock screen. Press the Home button to unlock.
Step 8. Touch the language option until the Home screen occurs, and you are able to access to more functions on your device.
Part 3. Better Solutions for iCloud Locked iPhones
Since DNS bypass is not a reliable solution, users typically look for alternative methods. These fall into two categories, including official Apple methods and third-party solutions. If you are looking for a way to unlock the iCloud Activation Lock without the password, you can try other iCloud lock bypass techniques. Below, we have compared some popular alternatives to help you choose the best solution for your iCloud locked iPhone.
| iCloud Bypass Method | Direct Bypass | Signal Bypass | IMEI Bypass | IPSW Bypass |
|---|---|---|---|---|
| Unlock Type | Tool-based | Tool-based | Online service | Online service |
| Requirements | USB Cable | USB Cable | IMEI Number & Device Info | IPSW Files |
| Unlock Status | Permanent | Permanent | Permanent | Temporary |
| Well-Known Platforms | MagFone | iBypass | UnlockHere | IPSW.me |
| Success Rate | 90% | 80% | 60% | 70% |
| Difficulty Level | ⭐ | ⭐⭐⭐ | ⭐⭐ | ⭐⭐⭐⭐⭐ |
| Notes | - | Keeps cellular function after unlock | Risk of data exposure | Hard to find suitable IPSW files |
| Read More | Listed Below | Read More | Read More | Read More |
There are several ways to bypass the iCloud lock on a locked iPhone, and MagFone iPhone Unlocker, an Activation Lock removal tool, is more secure and effective compared to other methods. As this tool keeps user information absolutely confidential and is faster to bypass iCloud lock with one click.
Provided you're in urgent need of an iCloud Lock bypass, MagFone iPhone Unlocker can help you off the hook. It's a trustful and efficient tool that helps to bypass the iCloud Lock on the iPhone and iPad without the Apple ID password. All you need is just a computer and a USB cable. Apart from bypassing the Activation Lock, it can fix various lock issues. If you're interested in bypassing iCloud Lock through MagFone iPhone Unlocker, follow the steps below to have a free try.

MagFone iPhone Unlocker
Bypass iCloud Activation Lock on iPhone, iPad, and iPod touch without the original Apple ID or password.
Step 1Start MagFone iPhone Unlocker
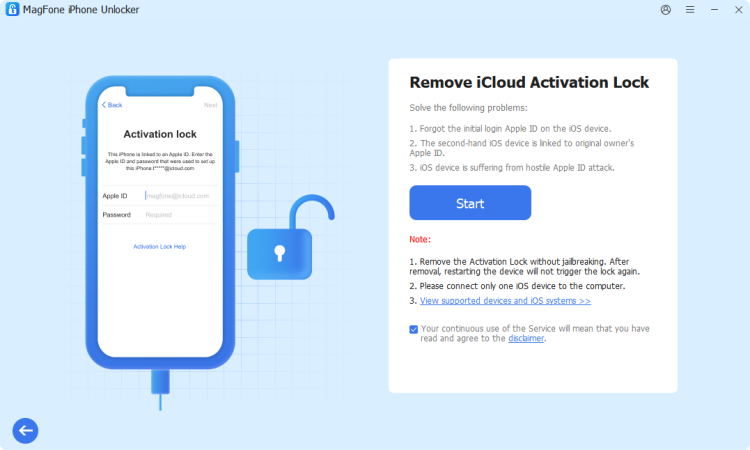
Start MagFone iPhone Unlocker on a computer, then you can link your locked iPhone to the computer. In the main interface of the software, click Remove iCloud Activation Lock. Proceed to click the Start button, once the device is detected by the software.
Step 2Bypass iCloud Activation Lock
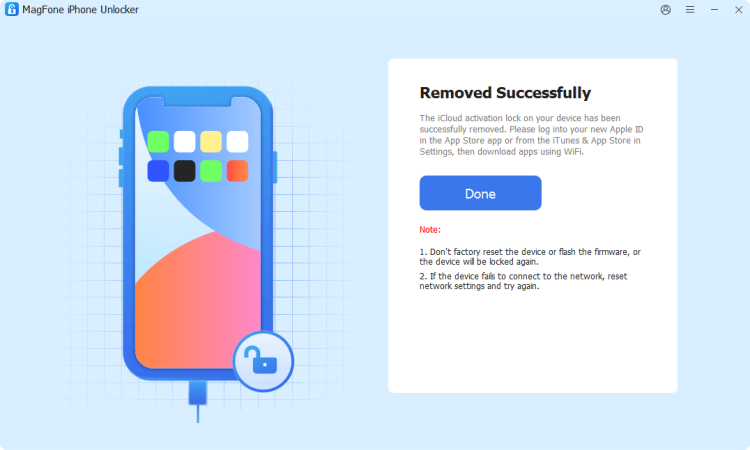
When the iCloud Activation Lock removal process starts, you need to follow the onscreen instruction to get your locked device into recovery mode. Then the MagFone software will automatically bypass the iCloud Activation Lock on the device.
Part 4. FAQs about iCloud DNS Bypass
-
Is iCloud DNS bypass real?
Yes, but only as an outdated workaround that no longer works on modern iOS devices. If your locked iPhone runs iOS 7, 8, or 9, you can alter the DSN settings to bypass the iCloud Activation Lock and then access the device without entering the Apple ID password.
-
Is iCloud DNS bypass safe to use?
Not always the same safe as the official solutions. Using DNS to bypass the iCloud lock isn't a totally secure way. It's just troubleshooting when you cannot find a better solution and want to solve the iCloud lock issue quickly.
-
Will iCloud DNS bypass erase all data on my iPhone or iPad?
No, iCloud DNS Bypass does not erase your data. It only redirects activation requests to a third-party server, allowing limited access without removing existing files. However, if you reset your device, all data will be lost.
-
What features can I use after DNS Bypass?
You can access some basic functions like browsing the web, playing games, and taking photos. Features like calling, texting, and installing apps from the App Store are restricted, but they may be unlocked by following the steps in Part 2.
Part 5. Conclusion
The iCloud DNS bypass method remains popular because it appears to offer a simple solution to a complex problem. However, in reality, it is an outdated workaround that no longer provides access on modern models. What's more, this method fails often. Here you can try other iCloud bypass methods like using MagFone iPhone Unlocker outlined above.

Dylan Jones
Editor in chief





