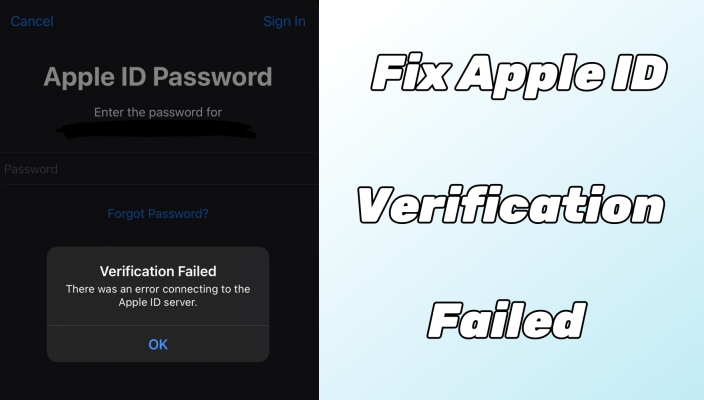
We have all been there: you try to download an app or update your settings, and suddenly, you face an error saying, "Verification Failed. There was an error connecting to the Apple ID server." Have you frequently encountered the same Apple ID Verification Failed error when you install an app in the App Store or manage iCloud on your iPhone? More frustratingly, this error prevents you from accessing services connected to iCloud, the iTunes Store, the App Store, Find My, and more. But don't worry. In this guide, we will explore the reasons behind this error and provide practical ways to fix it quickly.
- Part 1. Why Does It Say Verification Failed on Apple ID?
- Part 2. Preliminary Checks: Verification Failed Apple ID
- Part 3. How to Solve Apple ID Verification Failed [Easy]
- Solution 1. Restart Your iPhone
- Solution 2. Get a New Verification Code
- Solution 3. Switch to a Different Network
- Solution 4. Change Apple ID Password
- Solution 5. Sign Out and Back into Apple ID
- Solution 6. Remove Apple ID from iPhone
- Solution 7. Disable an Active VPN
- Solution 8. Correct Date & Time
- Solution 9. Update the iOS Version
- Solution 10. Reset Network Settings
- Solution 11. Reset All Settings on iPhone
- Part 4. How to Fix Apple ID Verification Failed [Advanced]
- Part 5. FAQs about Verification of Apple ID Failed
- Part 6. Conclusion
Part 1. Why Does It Say Verification Failed on Apple ID?
Apple ID verification is a security measure that Apple uses to ensure that the person trying to access an account is the rightful owner. It involves verifying your identity through various means, such as entering your password or using two-factor authentication. When your Apple ID keeps saying Verification Failed on your iPhone or iPad, it can be triggered for different reasons. The typical reasons are listed as follows.
Reason 1. Apple Server Issues
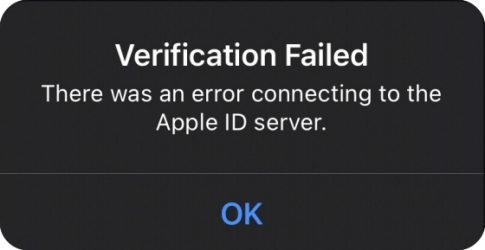
Sometimes, Apple servers may be temporarily down or experiencing high traffic, causing temporary verification problems. In this case, you will encounter an error - Verification Failed. There was an error connecting to the Apple ID server.
Reason 2. Incorrect Apple ID or Password
A common reason is entering the wrong information carelessly. For instance, when the security verification information is asked in the logging process, entering the wrong Apple ID or password is the cause that gets you into this verification problem - Verification Failed. There was an error verifying the password of your iPhone, or Your Apple ID or password is incorrect.

Reason 3. Unstable Internet Connection
Another influential reason is using an internet connection without stability. If your network is unstable or slow, it can cause verification to fail.
Reason 4. Systematic Bugs
The systematic glitch in your iPhone will trigger different problems, including logging errors, operating conflicts, and so on. One common error is Apple ID Verification Failed. An unknown error occurred. If you've recently installed a new iOS beta or are using an outdated iOS version, your iPhone may be experiencing instability and vulnerabilities.

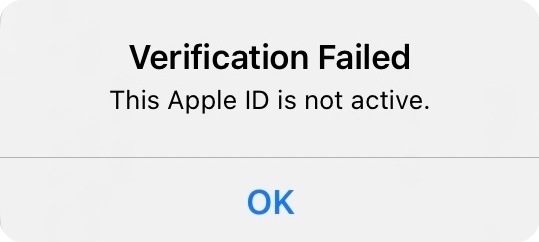
Reason 5. Outdated Apple ID Information
Incomplete or outdated Apple ID information will trigger the Apple ID Verification Failed error. If you haven't completed your Apple ID information or don't update your trusted phone number and other information, you will receive an error - Verification Failed. This Apple ID is not active.
Part 2. Preliminary Checks: Verification Failed Apple ID
After figuring out the reason why your verification of Apple ID failed, you can check to see if there is a problem with the Apple server first. You, meanwhile, need to troubleshoot other things like the internet connection, Apple ID verification code, and Apple ID password. Let's go to troubleshoot the error on your iPhone first.
Check 1. Verify Apple's Server Status
The first thing you should do when an Apple ID Verification Failed error occurs is to check the Apple's system status. The Apple ID can't communicate with the server if the Apple ID server in your region is closed or operates in a bad situation. Therefore, go to check the status of the Apple server in your country by visiting Apple's System Status page. When a yellow or red color on the Apple ID service, it means that the server status of Apple ID has some problems. Then you can try to sign in again after the service is available.
Check 2. Check Internet Connection
Apple services, including Apple ID verification, will be disabled if your iPhone is connected to a lagging internet. When you encounter the Apple ID Verification Failed error, checking the internet connection is a simple and effective way first. Make sure that your iPhone is connected to a stable and useful internet network.
Check 3. Ensure Apple ID Password
If your iPhone shows a message - Verification Failed, your Apple ID or password is incorrect when trying to verify your Apple ID, you can make sure you are entering the correct Apple ID and password. The wrong Apple ID and password often trigger the verification error.
Check 4. Verify Apple ID Verification Code
Once enabling two-factor authentication, you are required to enter a verification code to get verified every time when you sign in to your Apple ID on a new device or browser. The verification code you need to enter will be sent to your trusted device or phone number. Check whether you enter the correct verification code when trying to verify your Apple ID.
Part 3. How to Solve Apple ID Verification Failed [Easy]
If you're encountering Apple account verification failed errors, there are several straightforward solutions that can help resolve the issue. The solutions in this section target different factors that may be causing the verification problem. First, we'll present three quick and simple methods to fix the issue with minimal effort.
Solution 1. Restart Your iPhone
Sometimes, a simple restart can resolve network issues. Turn your device off and on again to see if it helps. Follow the steps below to restart your iPhone.

Step 1. Press and hold the volume down button and the power button until the power-off slider shows.
Step 2. Drag the slider, then wait 30 seconds for your device to turn off.
Step 3. Turn it back on by pressing and holding the power button.
Solution 2. Get a New Verification Code
If you find that you get a notification of verification failed after logging into your Apple ID, there may be a security verification issue. Every time you sign into Apple ID on a new device, you have to enter a verification code to get verified. Have two-factor authentication enabled on your device, you can get the verification code through the following steps.
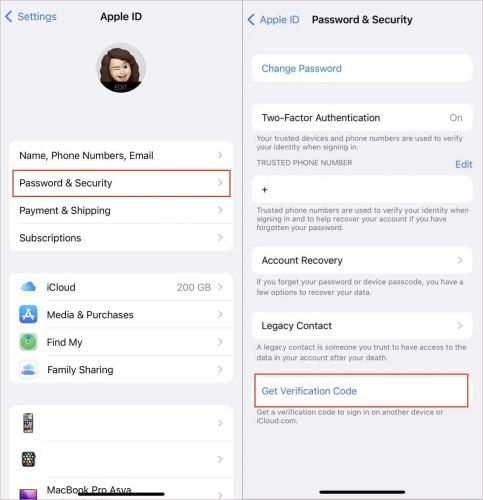
Step 1. Power on your other Apple device where you use the same Apple ID as your iPhone.
Step 2. Go to Settings > your Apple ID name, then choose Sign-In & Security.
Step 3. Tap Get Verification Code. Then use this code to verify your iPhone with the Apple ID Verification Failed error.
Solution 3. Switch to a Different Network
When the error of Apple ID Verification Failed is caused by the unstable or poor network, you can switch to a different WiFi network or use cellular data. Here's how to.
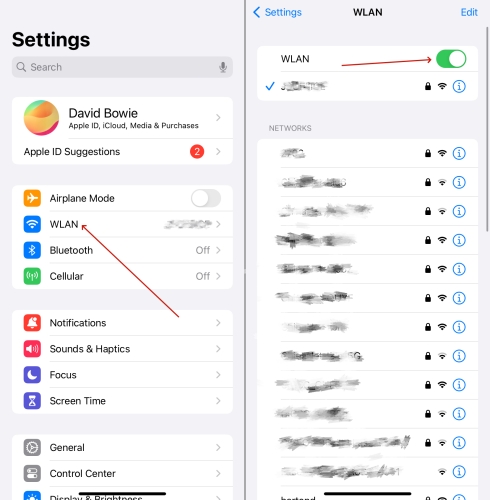
Step 1. Go to Settings on your iPhone, then tap Cellular or WLAN.
Step 2. Continue to select a different WiFi to connect.
The next solutions involve adjusting your Apple ID-related settings. Changing them can refresh the connection while helping address authentication issues. Following these steps is effective when the issue lies within your account settings or connections.
Solution 4. Change Apple ID Password
If the Apple ID verification failed but you think the password is correct or you truly forgot the Apple ID password, another attempt to this verification error is to change your Apple ID password. Here are the steps to reset your Apple ID password to fix the verification failure on Apple ID issue.
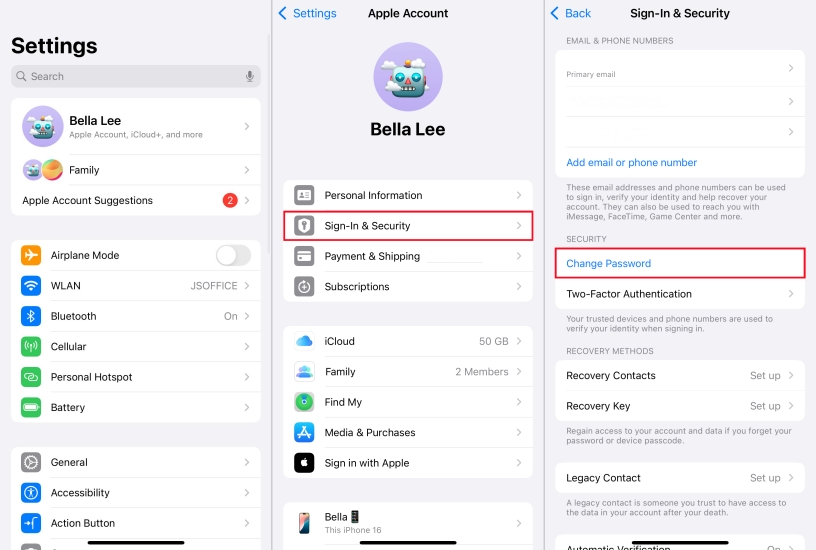
Step 1. In Settings on your iPhone, tap your Apple ID name.
Step 2. Tap Sign-In & Security > Change Password, then enter the screen lock passcode.
Step 3. Enter a new Apple ID password and input it again to confirm.
Step 4. Select Change to save your new passcode.
Solution 5. Sign Out and Back into Apple ID
If your Apple ID keeps failing at verification, it is advisable for you to sign out of your Apple ID for all Apple services on your iPhone. This will help you fix the issue. To sign out of your Apple ID, do the following steps on your iPhone.
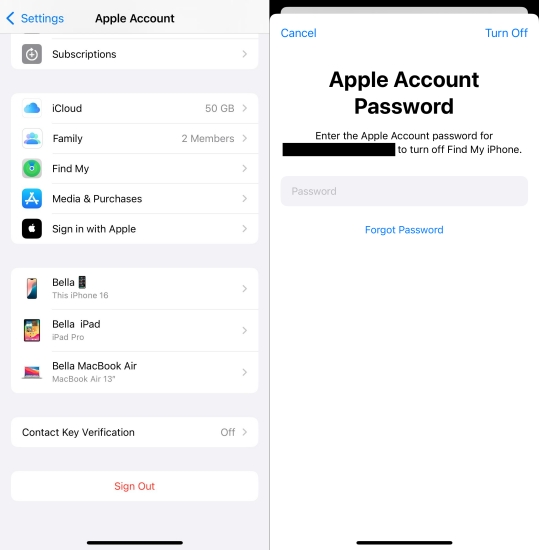
Step 1. Tap your Apple ID name in Settings of your iPhone.
Step 2. Scroll down to tap Sign Out, then enter your Apple ID password.
Step 3. Tap Turn Off to confirm to sign out of your Apple ID.
Step 4. Go back to tap Sign Into and enter your Apple ID credentials to sign in again.
Solution 6. Remove Apple ID from iPhone
When you have signed into your Apple ID on many devices, there will happen the error of Apple verification failed. In this case, you can try to sign out of your Apple ID everywhere to fix the issue. You can go to appleid.apple.com to manage the device where you use your Apple ID.
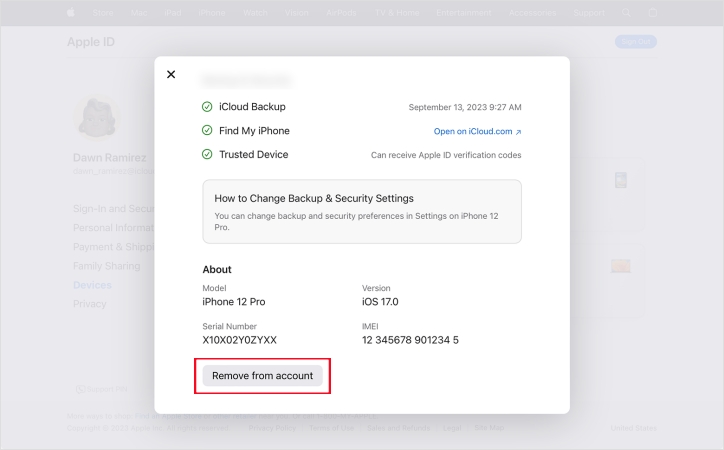
Step 1. Navigate to appleid.apple.com and sign in with Apple ID.
Step 2. Click the Devices button to manage the device with your Apple ID.
Step 3. Choose the device with the error and click Remove from Account.
In addition to Apple ID-related settings, other configurations on your device can also impact Apple ID verification. The next set of solutions focuses on adjusting these settings to ensure proper verification. By following the steps below, you can resolve any device settings that may be causing conflicts with the Apple ID verification process.
Solution 7. Disable an Active VPN
Turning on the VPN may interfere with the Apple server, such as regional mismatches, which results in Apple ID Verification Failed. As long as you turn off the VPN, your internet connection on your device will be more stable. Here are the steps to disable VPN on the iPhone.
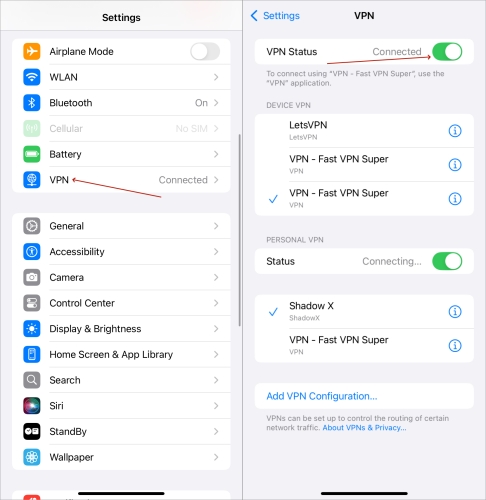
Step 1. Tap Settings, then go to the VPN option.
Step 2. Toggle the VPN Status button to disable the active VPN.
Solution 8. Correct Date & Time
If the Apple ID Verification Failed, an unknown error happens when you try to keep your iPhone synced with iCloud, the date and time on your iPhone should accurately match. To fix the issue, it is important to correct the date and time, especially for a new iPhone.
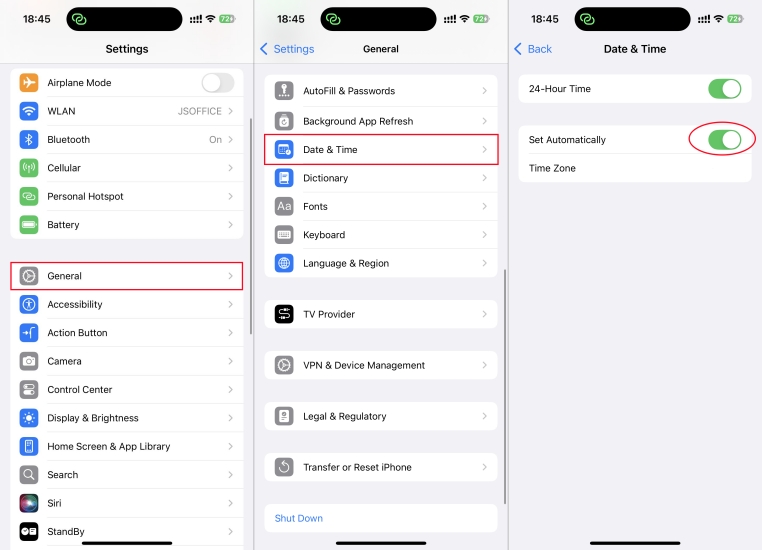
Step 1. Open Settings on your iPhone, then tap General.
Step 2. Under General, tap Date & Time.
Step 3. Toggle on Set Automatically to make sure the date, time, and time zone are correct.
Solution 9. Update the iOS Version
Apple's updates are always released with bug fixes and improvements. Updating your iPhone to the latest version enables it to be protected from bugs and malware. If the verification error of Apple ID on your iPhone is related to the system, the issue will be solved after updating your iPhone.
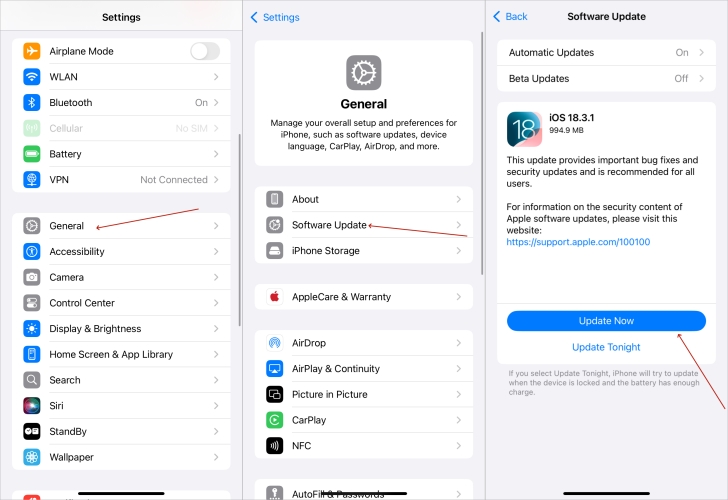
Step 1. Open the Settings app and tap General on your iPhone.
Step 2. Choose Software Update to check whether an update is available.
Step 3. Tap Download and Install for a new version.
Step 4. Enter your screen lock passcode, then tap Install Now to update your device.
Solution 10. Reset Network Settings
Once switching to a different network, you should be able to fix the issue. But if the network on your iPhone still affects the verification of your Apple ID, you can try to reset the network settings on your iPhone. Perform the following steps to reset the network settings.
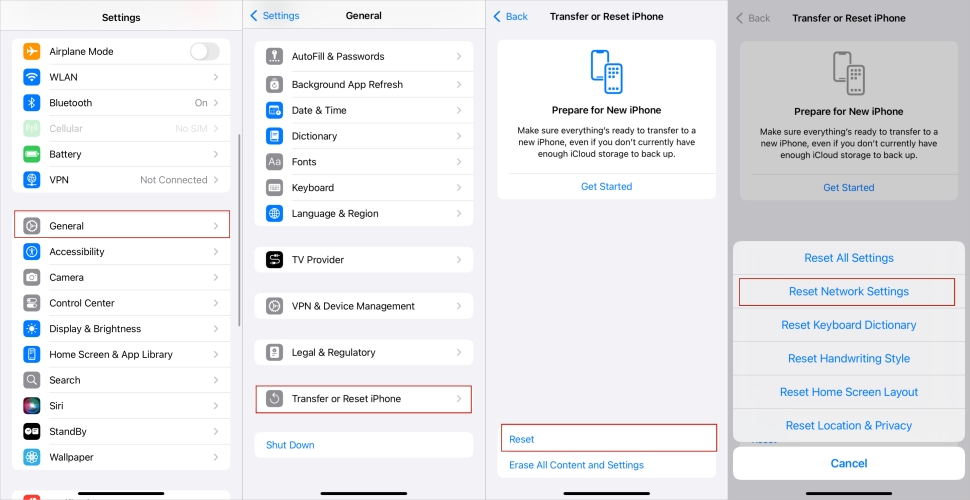
Step 1. On your iPhone, head to Settings > General.
Step 2. Scroll down to tap Transfer or Reset iPhone.
Step 3. Tap Reset > Reset Network Settings, then enter the passcode.
Step 4. Tap Reset Network Settings to confirm.
Solution 11. Reset All Settings on iPhone
If all else fails, you can reset your settings on your iPhone. This won't delete your data but will reset system settings. Just go to reset all settings on your iPhone by following the steps below.
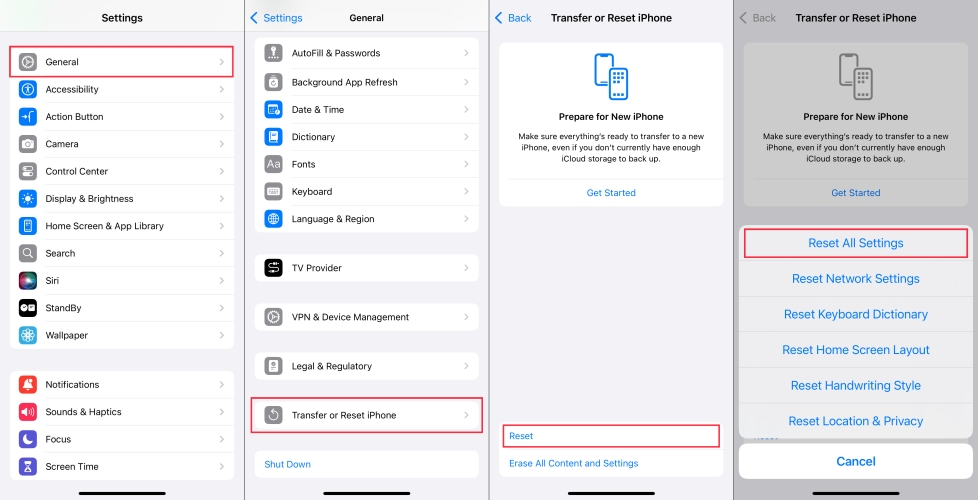
Step 1. Locate Settings on your iPhone, then tap General.
Step 2. Tap Transfer or Reset iPhone at the bottom of the screen.
Step 3. Tap Reset > Reset All Settings and enter the screen passcode.
Step 4. Tap Reset All Settings again to confirm.
Part 4. How to Fix Apple ID Verification Failed [Advanced]
If you have tried all the solutions above but the Apple ID verification still keeps failing, there may be something wrong with your iPhone's system. By fixing some of the bugs and glitches in the system, you can fix the problem in less than a minute. Check out the comparison table below to find the best solution for you to fix the iOS issues.
| Solutions | Data Loss | Requirements | Difficulty | Time |
|---|---|---|---|---|
| iOS System Repair Tool | No | None | ⭐ | Quick |
| Factory Reset iPhone | Yes | Screen Passcode | ⭐⭐ | Quick |
| Restore iPhone in iTunes | Yes | Screen Passcode USB Cable Latest iTunes Version |
⭐⭐⭐ | Long |
Solution 1. Use an iOS System Repair Tool
If you have applied all solutions to your iPhone but it is still stuck in Apple ID Verification Failed, then your iPhone may be in a deeper system glitch. To solve this issue, you can make use of MagFone iOS System Recovery. Functioning as the best choice to repair system issues, MagFone iOS System Recovery has the ability to fix over 150 kinds of iOS and iPadOS issues while not deleting any data and content.
With the help of MagFone iOS System Recovery, you can fix those issues that arise from the system glitch, such as Apple ID Verification Failed, iPhone stuck on software update, iPhone yellow screen of death, and more. Now follow the steps below to resolve your problem with MagFone iOS System Recovery. First, download and install MagFone software. Then do as follows.
MagFone iOS System Recovery
Fix various iOS and iPadOS system issues, such as black screen, boot loop, frozen screen, or stuck on Apple logo, without data loss.
Step 1 Run MagFone iOS System and Link iPhone
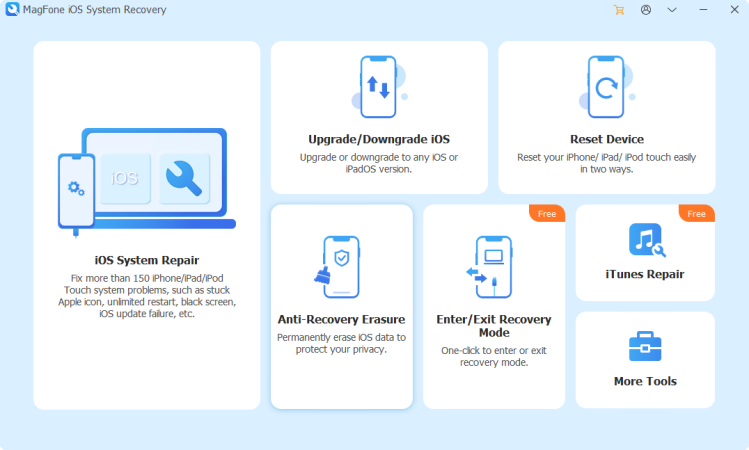
To begin with, you can connect your iPhone to your computer via a USB cable. Then start MagFone iOS System Recovery on the computer and enter the iOS System Repair interface.
Step 2 Select Standard Repair to Fix the Problem
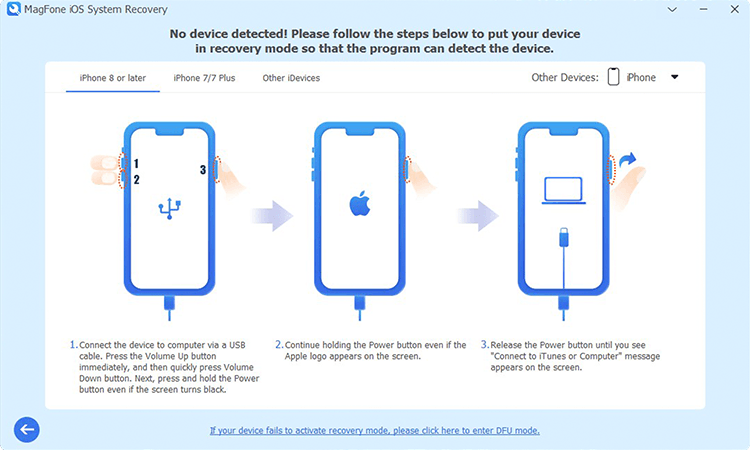
After selecting the iOS System Repair option, click the Standard Repair button. And your iPhone will be immediately detected by the software. Proceed to put your device into recovery mode.
Step 3 Download and Verify the Firmware Package
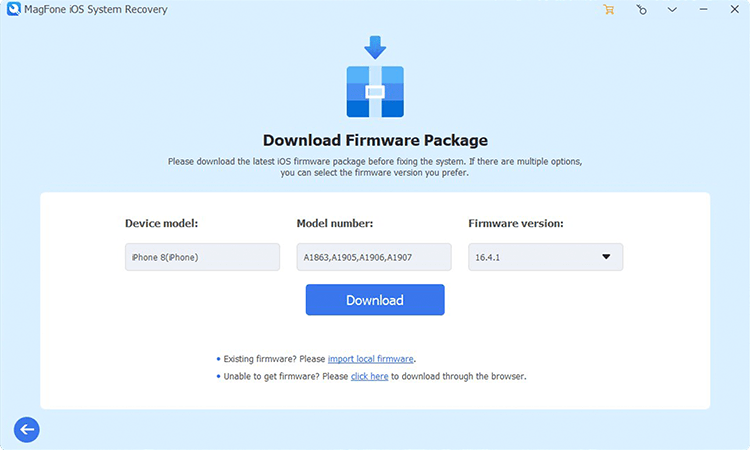
The device information will be displayed on the screen. You need to check the device information and select the firmware version. Then you can click the Download button to download the firmware.
Step 4 Start to Repair the Verification Issue in Standard Mode
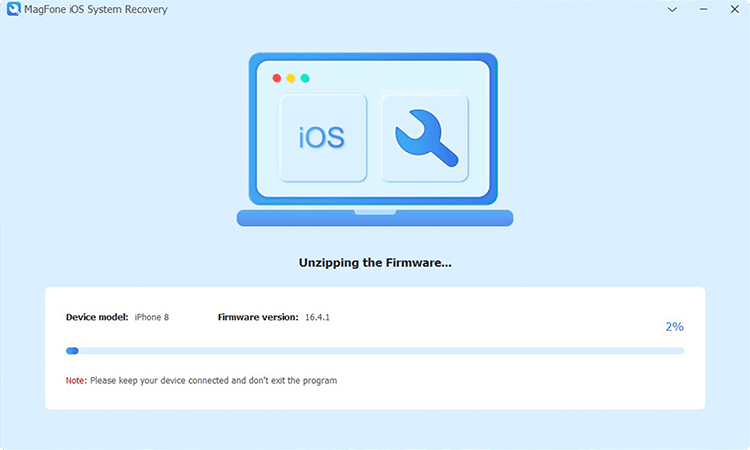
Click the Start Standard Repair button to fix the issue. Wait for a few minutes until the prompt Repair Completed appears. Proceed to click the Finish button when it is finished.
Solution 2. Reset iPhone to Factory Settings [Data Loss]
Resetting your iPhone to factory settings is another solution to fix the Apple ID Verification Failed error. However, once you factory reset your iPhone, all the data and settings on your iPhone will be deleted. Before starting, you can make a backup of your device in advance. You can then follow the steps below to reset your device to its factory default settings.
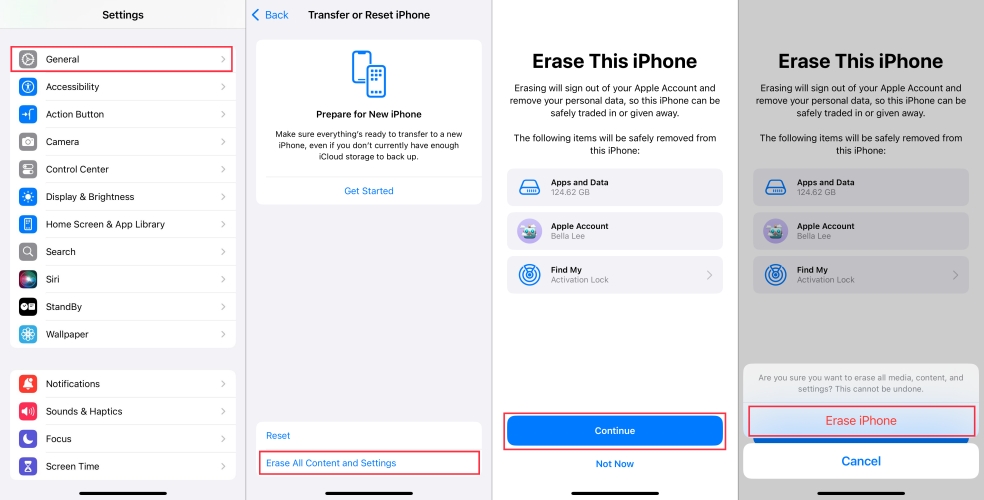
Step 1. Go to Settings > General and tap Transfer or Reset iPhone.
Step 2. Tap Erase All Content and Settings > Continue.
Step 3. Enter your screen lock passcode to confirm.
Step 4. Tap Skip iCloud Backup > Erase iPhone.
Solution 3. Restore iPhone with iTunes
In addition to resetting your iPhone to factory settings directly, you can use iTunes or the Finder to fix various issues. Before using iTunes to repair your iPhone, you can make a backup of your device first. Then you can follow the steps below to repair your device with iTunes. Here's how to.
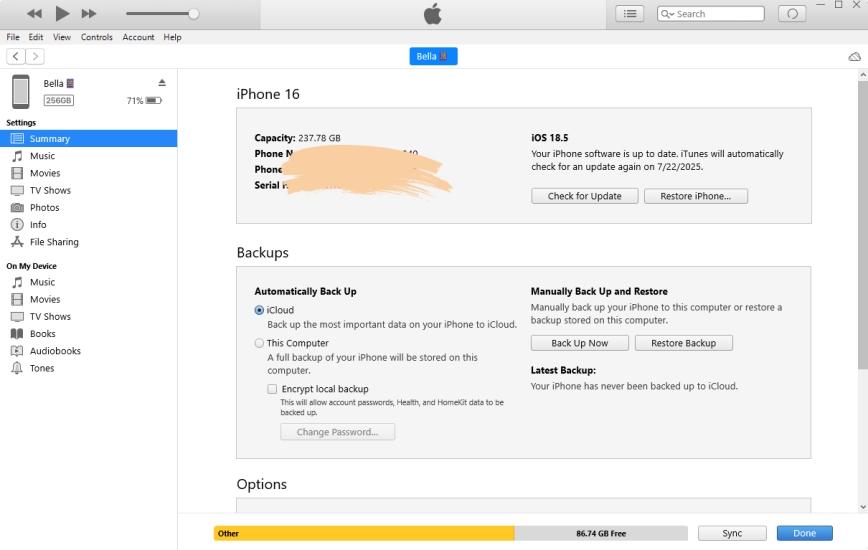
Step 1. Connect your iPhone to your computer through a USB cable, and then trust that computer with the screen passcode on your iPhone.
Step 2. Click the device icon near the top left of the iTunes window.
Step 3. Click Restore, then follow the onscreen instructions.
Part 5. FAQs about Verification of Apple ID Failed
-
How to get Apple ID verification code without phone?
There are a few ways you can get a verification code. You can generate a code from your trusted device or get it from an email address.
-
How to sign into iCloud without verification code?
If your Apple ID is using two-factor authentication, then you cannot log in without the verification code. However, if you have another device that is using your Apple ID already, you can make it generate a code for you by going to Settings. You can refer to the detailed steps shown in Solutions 2 of Part 3.
-
How to stop Apple ID verification pop up?
You can solve this issue by updating your Apple ID and security questions for Apple ID. Or you can update your device and reset the settings on your device. More simple and practical methods are listed in How to Fix Apple ID Verification Keeps Popping Up. Read on and follow the guide to solve your problems.
-
How long does Apple ID verification take?
It won't cost you too much time. Just wait for a while to get a verification code and sign in to your Apple ID again. If you are still stuck in the verification issue, you can consider the recommended tool - MagFone iOS System Recovery, to resolve your issues in an effective and efficient way.
Part 6. Conclusion
We present various ways to help you tackle the frustrating Apple ID Verification Failed issue on your iPhone in this article. After reading the entire article, you will know why your Apple ID keeps saying Verification Failed and how to fix it in several easy and efficient ways. However, if you have tried the above methods and are still stuck in the issue, or you find these methods hard and time-consuming, you can use MagFone iOS System Recovery, the ultimate solution that's both straightforward and user-friendly.

Dylan Jones
Editor in chief